AI Character Generation Tutorial: Create Consistent Characters for Video

Share this post:
AI Character Generation Tutorial: Create Consistent Characters for Video
AI FILMS Studio lets you create persistent characters and actors that carry a consistent appearance across multiple generations. This guide covers the standalone Character Generator, both available models, the @character tag for video, and the Character Generation node in the Node Graph Editor.
What Are AI Characters and AI Actors
An AI Character is a consistency asset. You provide reference images of a fictional character, the platform generates a styled character sheet, and the result is stored with a unique character ID. That ID can be injected into compatible video prompts to lock in the character's appearance across shots.
An AI Actor is a reusable reference identity. You upload a source image, name it, and save it to your library. Any generator that supports actor input will automatically include that reference image in the generation request.
Both live in My Content (Workspace sidebar) and are available across the standalone generators and the Node Graph Editor.
Creating an AI Character
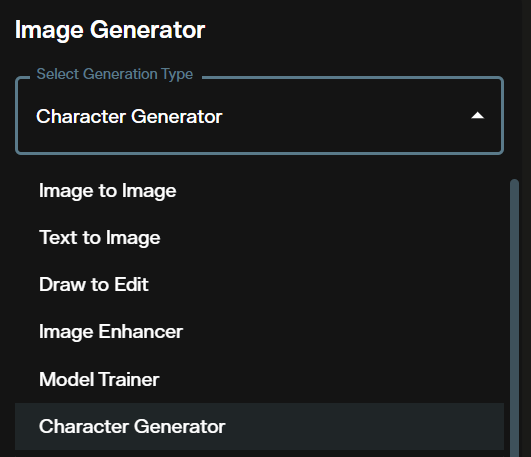
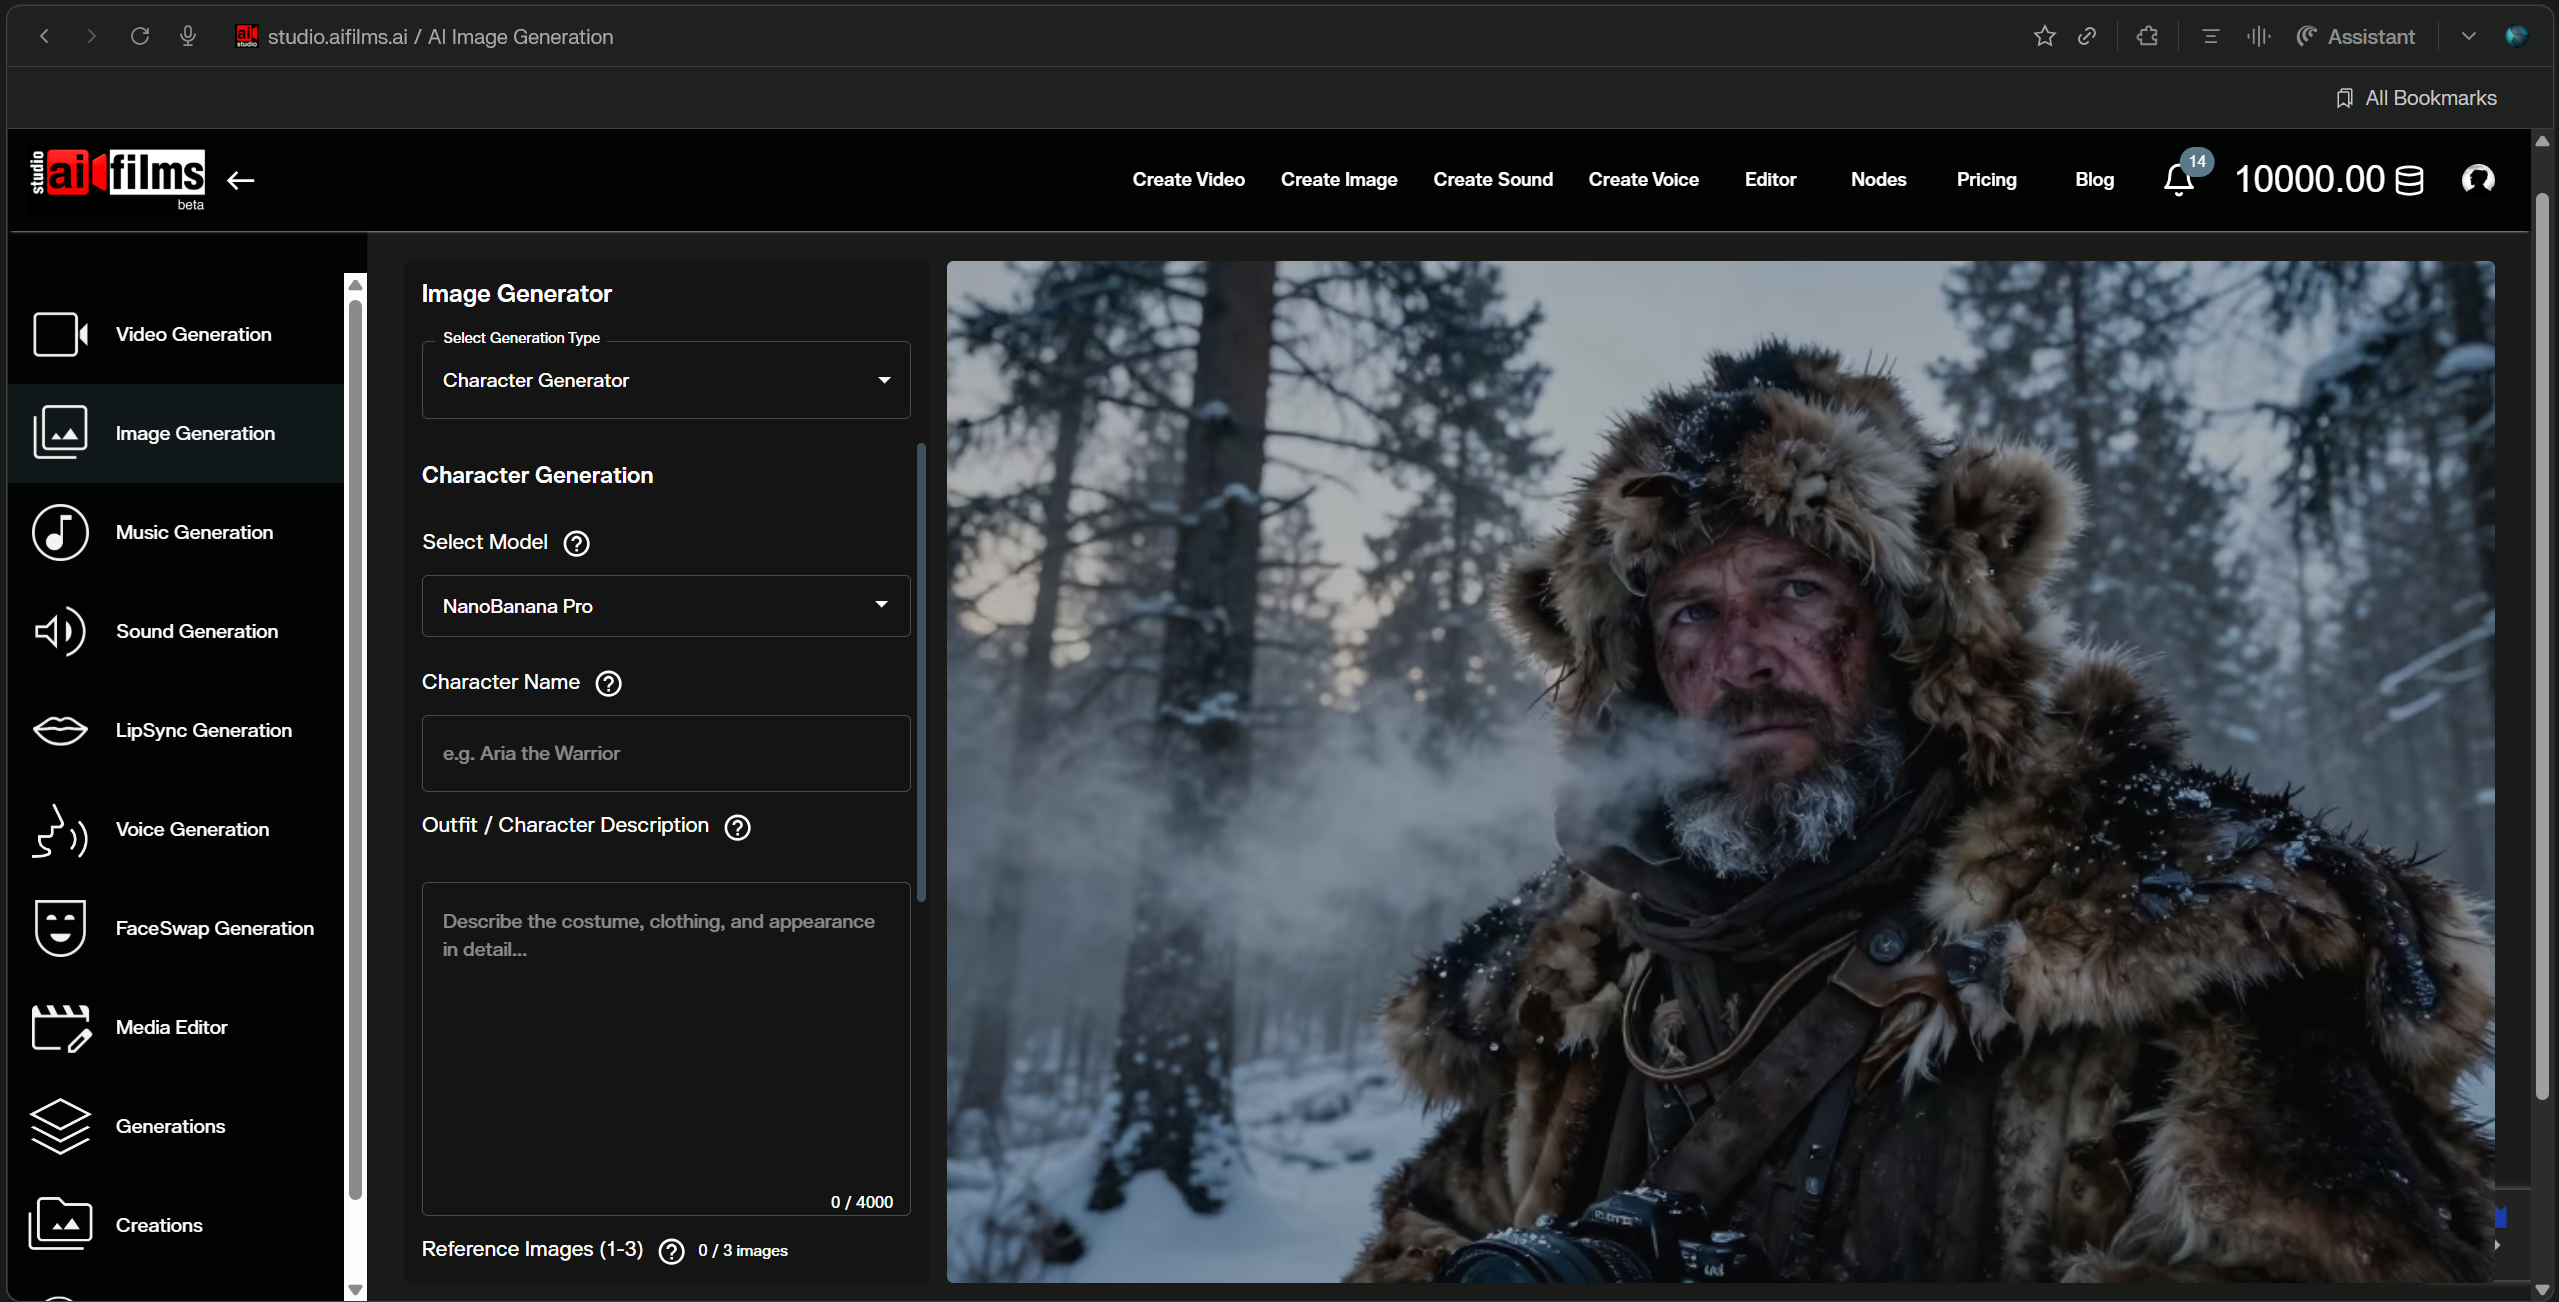
Step 1: Open the Character Generator
Navigate to the Image Generator workspace. In the generator type dropdown, select Character Generation.
The Character Generator interface loads with sections for reference images, prompt, model selection, name, and settings.
Step 2: Upload Reference Images
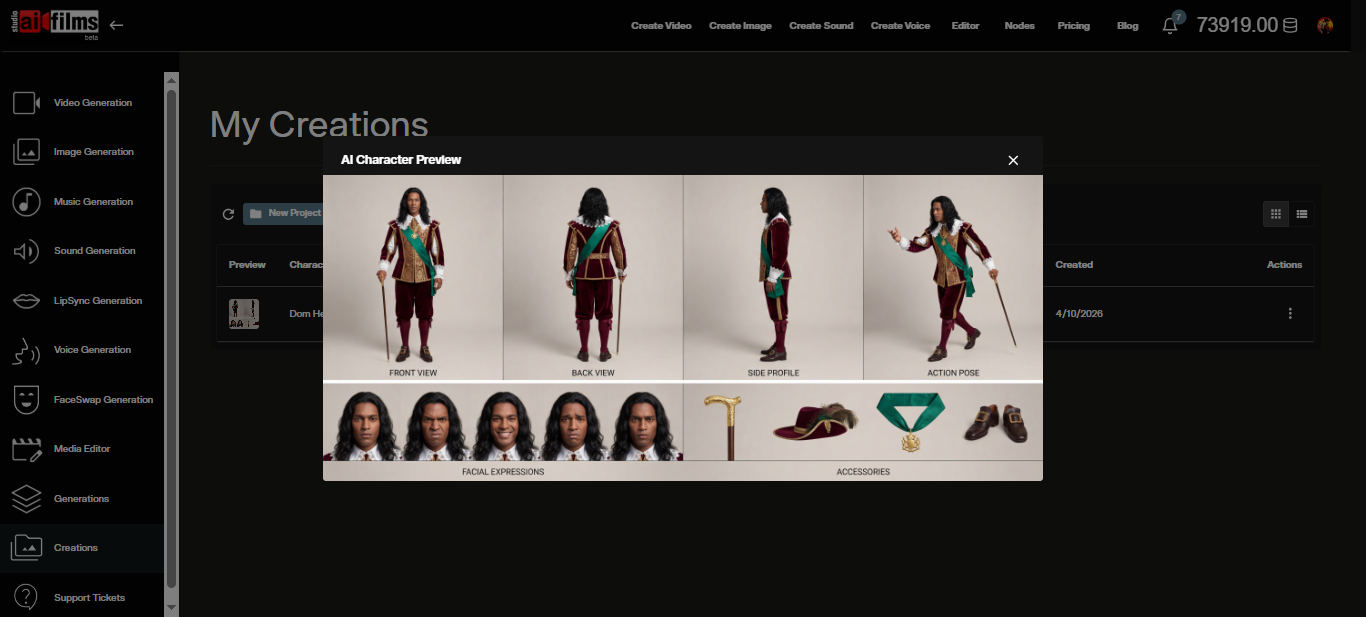
Upload 1 to 3 reference images of your fictional character. A single image works, but providing two or three angles improves consistency, particularly for NanoBanana Pro's multi pose output.
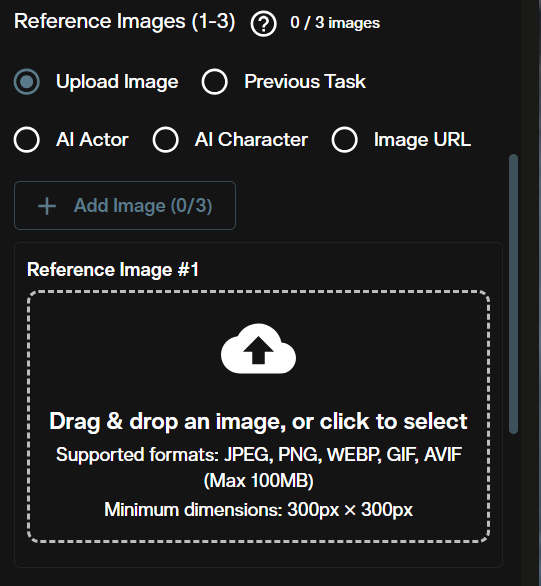
Use only images you have the rights to. Do not use photos of real people without their explicit consent.
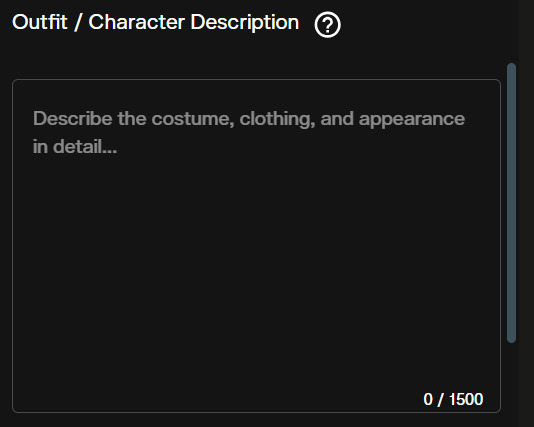
Step 3: Write the Appearance Prompt
Enter an outfit and appearance description in the prompt field. Describe attire, materials, accessories, and any style directives. This is not a scene description. Focus entirely on the character's look.
Step 4: Select a Model
Two models are available. Click the model dropdown to choose between them.

| Model | Outputs | Best For |
|---|---|---|
| NanoBanana Pro | 1 character sheet | Seedance 2.0 video injection, fast single output |
| MiniMax Image-01 | 1–9 images | Multiple variations, configurable aspect ratio |
NanoBanana Pro credits are non refundable. The upstream provider charges a flat per request fee regardless of outcome.
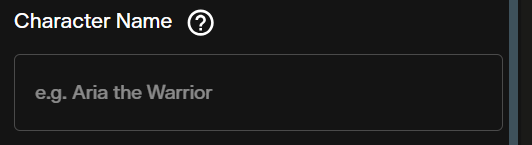
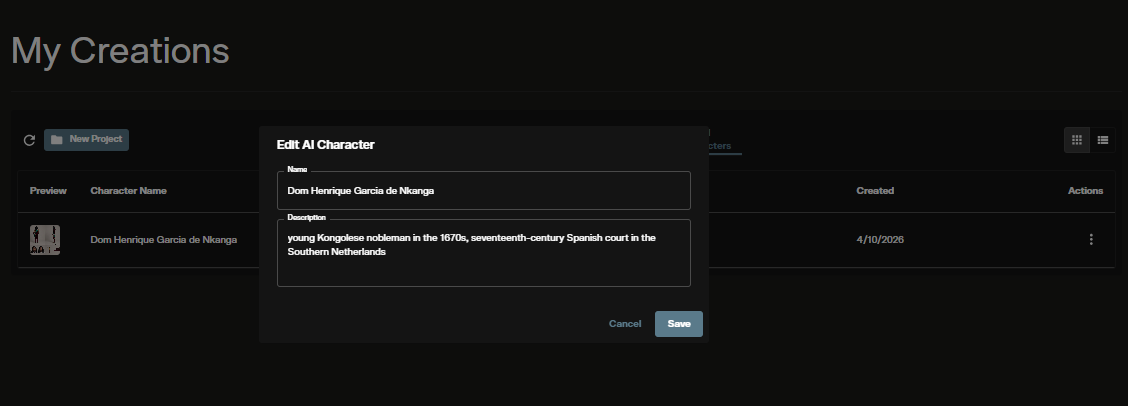
Step 5: Name Your Character
Enter a name in the character name field. This label appears in your AI Character Manager and in My Content.
Step 6: Configure Model Settings
For MiniMax Image-01, additional settings appear below the name field.
Output Size: Select the aspect ratio for the output image.
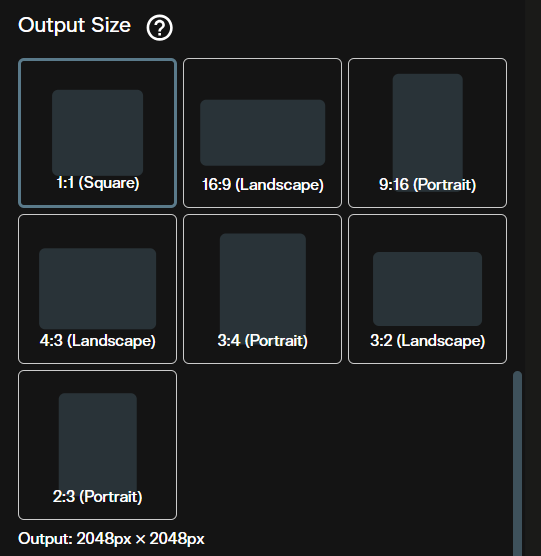
| Option | Dimensions |
|---|---|
| 1:1 | 2048×2048 |
| 16:9 | 1280×720 |
| 9:16 | 720×1280 |
| 4:3 | 1152×864 |
| 3:4 | 864×1152 |
| 3:2 | 1216×832 |
| 2:3 | 832×1216 |
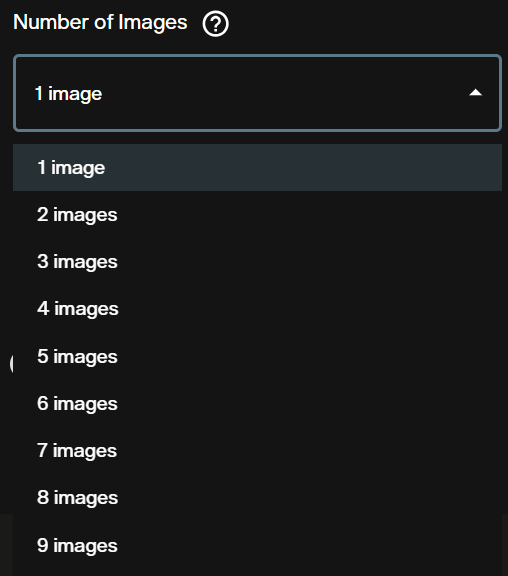
Number of Images: Drag the slider to set how many variations to generate (1–9). Credit cost scales with this value.
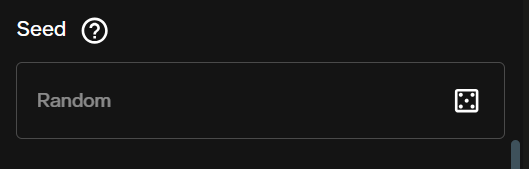
Seed: Enter an integer for reproducible results, or click the dice icon for a random seed. Leave blank for full variation.
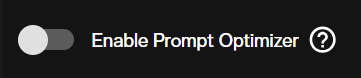
Enable Prompt Optimizer: When enabled, MiniMax's built in optimizer improves output quality at no additional credit cost.
Step 7: Check Credits and Generate
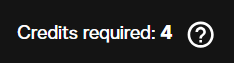
The credit cost estimate updates based on your model and settings. Review it before submitting.
Click Generate Character. Processing takes 1–3 minutes. You receive an in app notification when the character sheet is ready.
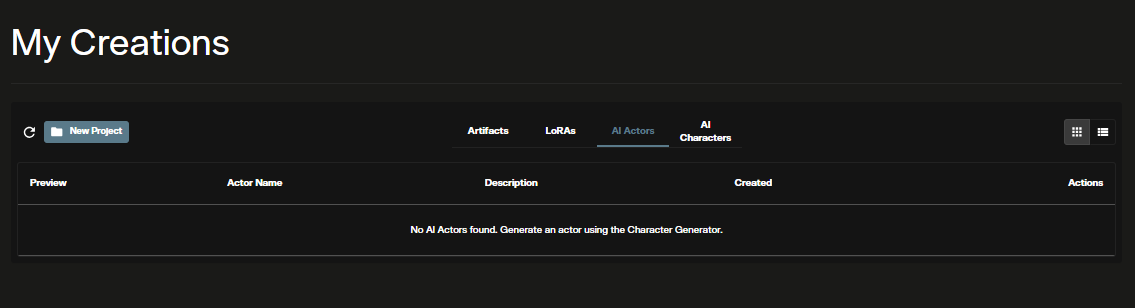
Managing Characters in My Content
Your generated characters appear in the AI Character Manager under My Content in the Workspace sidebar.
From the character list, you can view all characters with their names and creation dates, copy the character ID for use in prompts, and delete characters you no longer need.
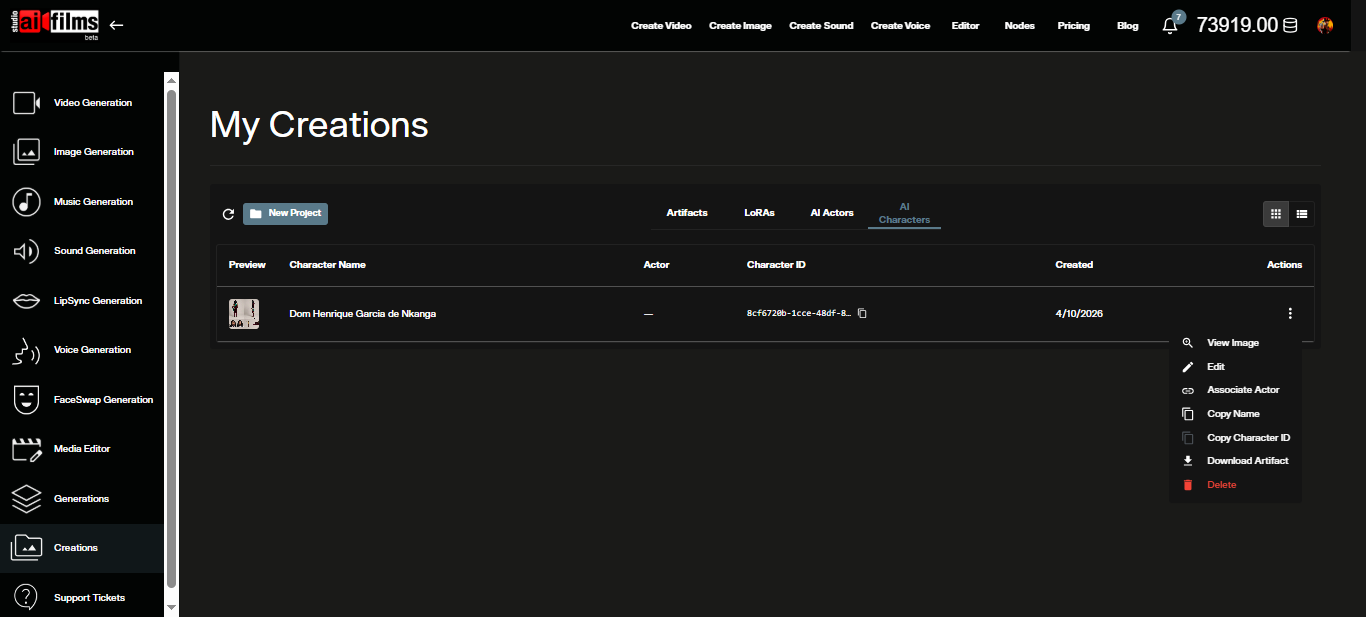
To rename or edit a character record before saving:
You can also import and export character files.

Using Your Character in Video Generation
Character IDs are permanent and reusable. Once you have generated a character, copy its ID from the AI Character Manager and inject it into any compatible video prompt using this tag:
@character:{your_character_id}
This is currently supported by Seedance 2.0 image-to-video. Open the AI FILMS Studio video workspace, select Seedance 2.0 Image to Video, and paste the tag at the start of your prompt. The generated video will reflect your character's consistent appearance throughout.
For a full walkthrough of the Seedance 2.0 generator, see the Seedance 2.0 tutorial.
Creating AI Actors
An AI Actor is a simpler, lighter reference asset. Instead of generating a character sheet, you upload a source image and save it as a named identity. That image is then automatically included in any generation where you select the actor.
Step 1: Open the Image Generator
Navigate to the image workspace. In the actor/character selector at the bottom of the form, enable it and click Add Actor.
Step 2: Name and Upload
Enter a name and optional description, then upload your reference image.
Step 3: Save to Library
Submit the generation. The output is saved as a new actor in your library. You can also browse, rename, or remove existing actors from My Content.

Using an Actor in a Generation
In any generator that shows the actor selector, click the Actor dropdown and choose an actor from your library. The reference image is automatically included in the request.
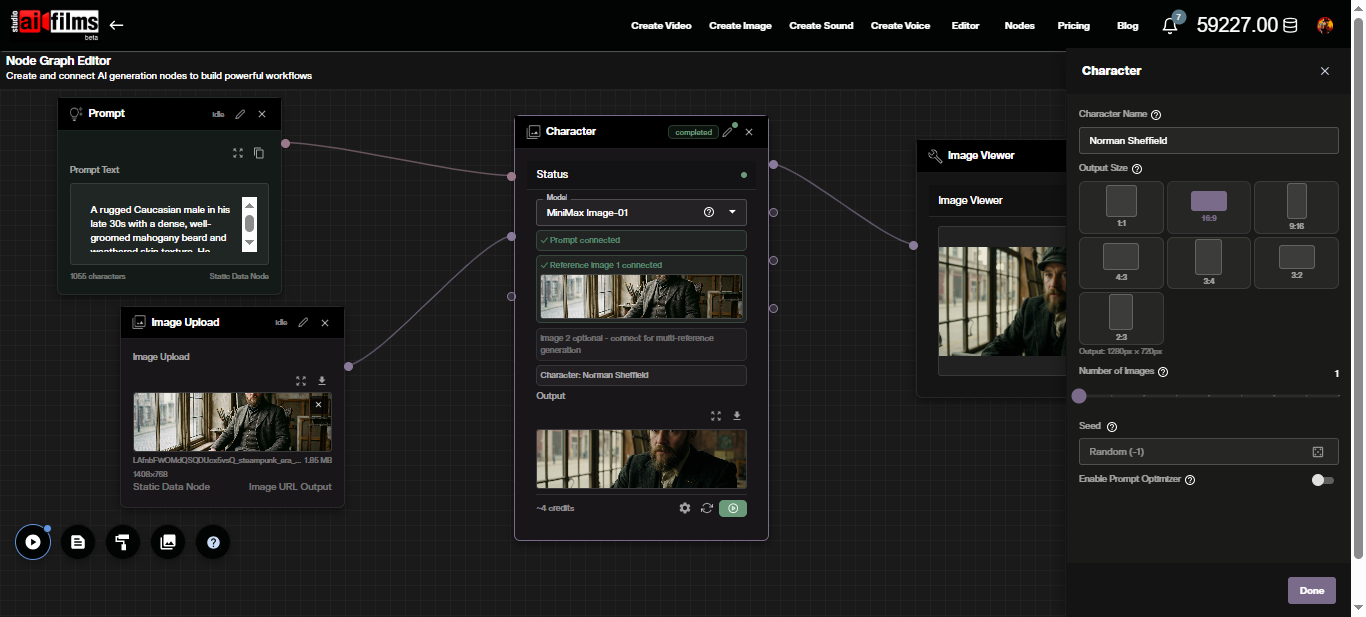
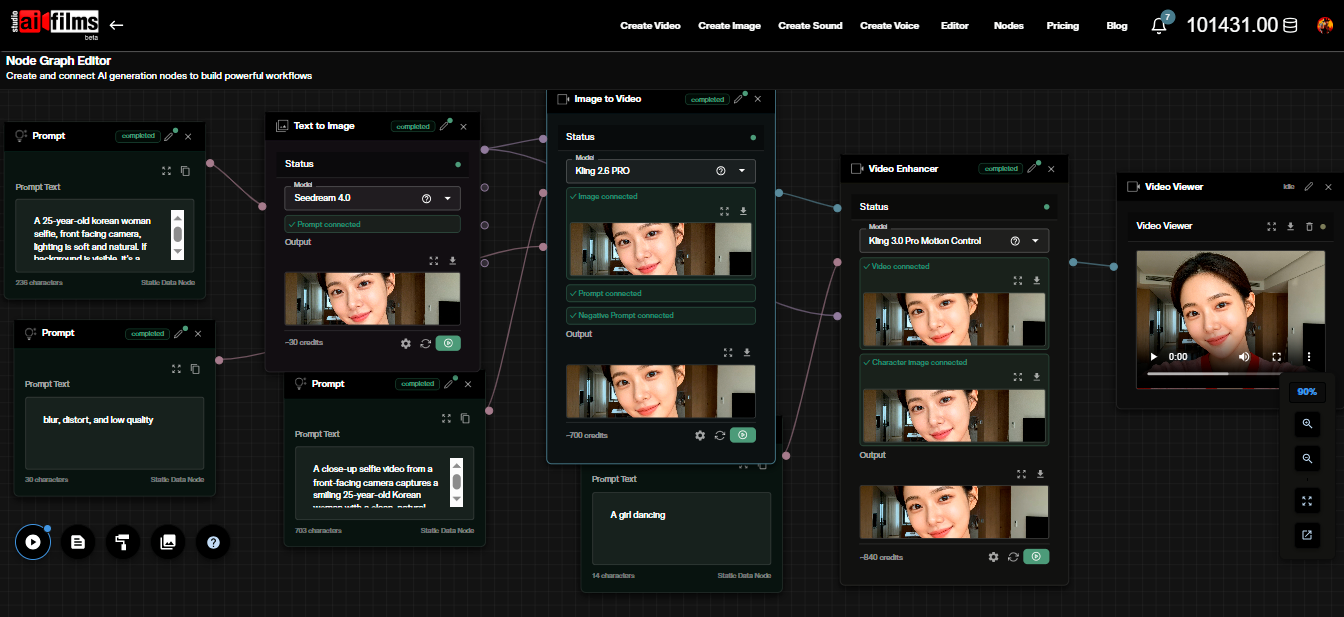
Character Generation in the Node Graph Editor
The Node Graph Editor lets you chain character generation into a full pipeline. For example: upload a reference image, generate a character, then feed the output directly into a video generation node.
Adding the Character Generation Node
Open the Node Graph Editor (Workspace sidebar → Node Graph). Click the node palette toolbar or right-click the canvas. Under Character Models, click Character Generation to place the node.

Connecting a Prompt Node
The character description must come from a connected Prompt node. There is no text field in the node body itself. This design lets you share one Prompt node across multiple Character Generation nodes.
- Add a Prompt node to the canvas.
- Type the outfit and appearance description into the Prompt node's text field.
- Drag a connection from the Prompt node's output port to the Prompt input port on the Character Generation node.
When connected, the node body shows a green "Prompt connected" indicator. The execute button remains inactive until the Prompt node is wired.
Connecting Reference Images
Image 1 is required. Image 2 is optional and provides a second angle for improved consistency.
Supported source nodes for image inputs:
| Source Node | When to Use |
|---|---|
| ImageUpload | You have an existing reference image file. |
| Text2Image | The reference image is generated upstream by a text-to-image step. |
| Image2Image | The reference is the output of a prior image transformation. |
Drag a connection from the image node's output port to Image 1 (or Image 2) on the Character Generation node. When image data is available, a small preview thumbnail appears on the node.
Model Selection and Settings Panel
The model selector is displayed inside the node body. Switch between NanoBanana Pro and MiniMax Image-01 at any time while the node is idle. Credit cost updates immediately.
Click the gear icon on the node header to open the settings panel. The Character Name field is always available. For MiniMax Image-01, Output Size, Number of Images, Seed, and Enable Prompt Optimizer settings appear as described in the standalone section above.
Executing the Node
The execute button becomes active when a Prompt node and an Image 1 source are both connected with available output. Click the play icon to start generation. The node status dot turns amber during processing and green on completion.
Result thumbnails appear inside the node body when complete. Up to four output ports carry the generated image URLs.
Wiring the Output
Connect the output ports to downstream nodes:
- Image Viewer: to preview the result.
- Image2Video: to feed the character directly into a video generation.
- Image2Image: to apply further edits before using in video.
The @character:{id} tag for Seedance 2.0 Image to Video nodes can also be typed directly into compatible prompt fields within the graph.
Prompt Examples
Strong character reference prompts combine physicality, attire detail, setting, and technical style directives. Below are two examples used to generate the characters shown in this tutorial.
Historical nobleman portrait:
A cinematic character reference of a young Kongolese nobleman in the 1670s, seventeenth-century Spanish court in the Southern Netherlands. Physicality: Deep ebony skin tone, sharp aristocratic facial features, direct and intelligent gaze, signature voluminous long wavy black afro hair cascading to the shoulders. Attire: Elaborate burgundy velvet doublet with intricate gold brocade embroidery, a wide starched white lace Van Dyke collar, a silk emerald green sash across the chest with a heavy gold heraldic medallion. Setting: Grand baroque palace hall with dark oak wood paneling, faded Flemish tapestries, and soft natural window light. Style: Photorealistic, 8k resolution, oil painting texture overlays, dramatic chiaroscuro lighting, regal posture, historical accuracy, hyper-detailed textile textures.
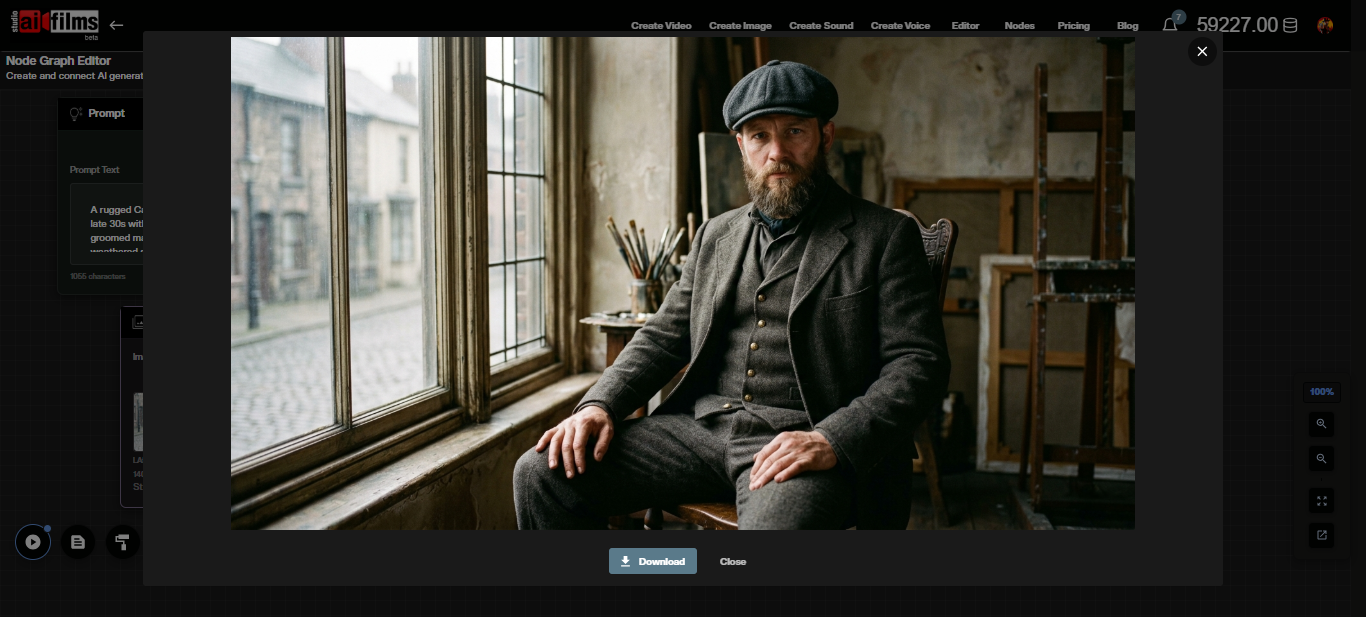
Contemporary character portrait:
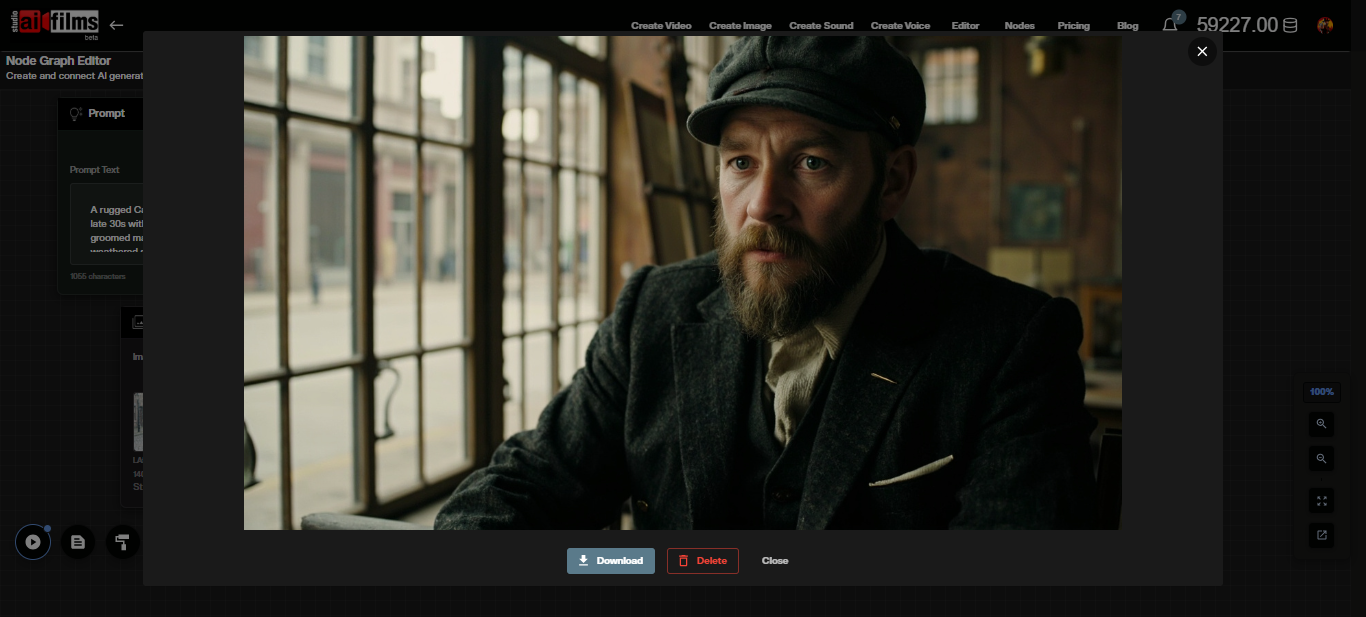
A rugged Caucasian male in his late 30s with a dense, well-groomed mahogany beard and weathered skin texture. He possesses piercing, solemn eyes and a stoic expression. He is wearing a dark charcoal wool three-piece herringbone suit with brass button detailing, an ivory-colored band collar shirt, and a structured grey tweed flat cap (newsboy style).

Atmosphere & Composition:

Cinematic 3/4 portrait, medium-wide shot. The character is seated in a rustic, high-ceilinged artist's studio, positioned next to a large paned industrial window. The composition should prioritize the subject, filling 75% of the frame. Soft, natural morning light spills from the window, creating high-contrast chiaroscuro shadows across his face and the heavy fabric of the suit.

Technical Stylization:

8k resolution, photorealistic, shot on 35mm lens, f/2.8 aperture for slight background bokeh. The background features muted earthy tones, an antique wooden easel with canvas, and a cobblestone street visible through the glass. Steampunk-era industrial aesthetic, gritty but refined, devoid of saturated or neon colors.
Both prompts follow the same pattern: specific physical description, detailed attire with materials, a defined setting, and explicit technical and style directives. Resolution and lighting instructions (chiaroscuro, bokeh) are particularly effective at anchoring the model to a consistent visual register.
Frequently Asked Questions
Can I use a real person's photo as a reference? Use only images you have the rights to. Do not use photos of real people without their explicit consent.
How many reference images should I provide? Image 1 is required. Image 2 is optional and gives the model a second angle. One image works; two produce more consistent results, particularly for NanoBanana Pro's multi pose character sheet.
Are NanoBanana Pro credits refundable if the generation fails? No. NanoBanana Pro credits are non refundable. The upstream provider charges a flat per request fee regardless of outcome. MiniMax Image-01 follows standard credit reconciliation rules.
Can I reuse the same character ID across multiple videos?
Yes. Character IDs are permanent. Copy the ID from My Content and paste it into any compatible prompt using @character:{id}. This is currently supported by Seedance 2.0 image-to-video.
Do I have to use a Prompt node in the Node Graph Editor? Yes. In the Node Graph Editor, the character description must come from a connected Prompt node. There is no text field in the node body. One Prompt node can be connected to multiple Character Generation nodes simultaneously.
When does a failed generation get refunded? For most model requests, credits are automatically refunded when a request fails within the AI FILMS Studio system. Failures on third-party systems after a successful submission are not refunded. NanoBanana Pro is an exception: credits are non refundable regardless of outcome.
Continue Reading


_(53532289710)_(cropped2).jpg?w=3840)
Video & LipSync
- Video Generator
- Text to Video
- Image to Video
- Start-End Frame to Video
- Draw to Video
- Motion Control
- Video Enhancer
- Video Upscaler
- Video to Video LipSync
- Audio to Video LipSync
- Image to Video LipSync
- Video FaceSwap
- Seedance 2
- Vidu Q3 Pro
- Gemini Omni
- Google Veo 3.1
- Kling 3.0 Pro
- Luma Ray 3.2
- LTX 2.3
- Happy Horse 1.1
- Kling 3.0 Motion
- ByteDance Upscaler
- InfiniteTalk
- InsightFace