Kling 3.0 & O1 Video Generation Tutorial

Share this post:
Kling 3.0 & O1 Video Generation Tutorial
The landscape of generative AI video has advanced rapidly, moving past short, silent clips into the realm of fully realized, cinematic scenes. Kling 3.0 and Kling O1 stand at the forefront of this shift, offering creators unprecedented control over physics, extended generation lengths, and native audio synchronization. Learning to leverage these models unlocks a new tier of production quality for your projects.
Understanding the Kling Models
When navigating the Video Generation workspace on AI FILMS Studio, choosing the right model for your specific shot is crucial. The Kling suite offers distinct capabilities tailored for different creative needs.
Kling 3.0 is the powerhouse for general text to video and image to video generation. It excels at producing highly realistic motion, maintaining complex physics, and generating native audio that syncs perfectly with the visual action. This model supports flexible durations natively, allowing for clips that extend up to 15 seconds.
Kling O1 is specialized for start and end frame video generation. By defining exactly where a scene begins and where it resolves, creators can craft seamless loops or highly controlled scene transitions.
Step-by-Step: Text to Video with Kling 3.0
Generating a cinematic shot from scratch requires a strong prompt and an understanding of the available parameters.
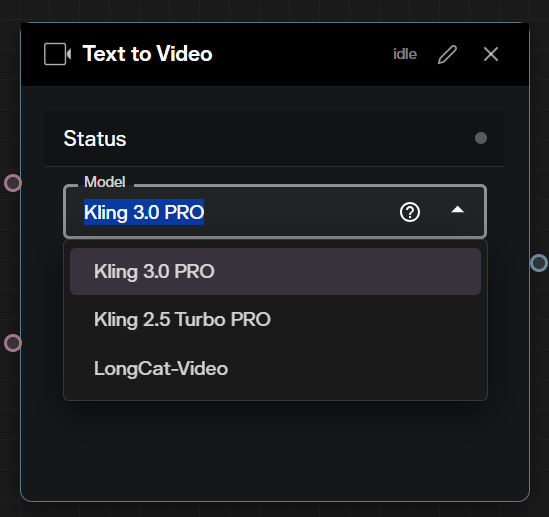
1. Access the Workspace
Navigate directly to the Video Generation workspace and select "Kling V3.0" from the text to video model options.
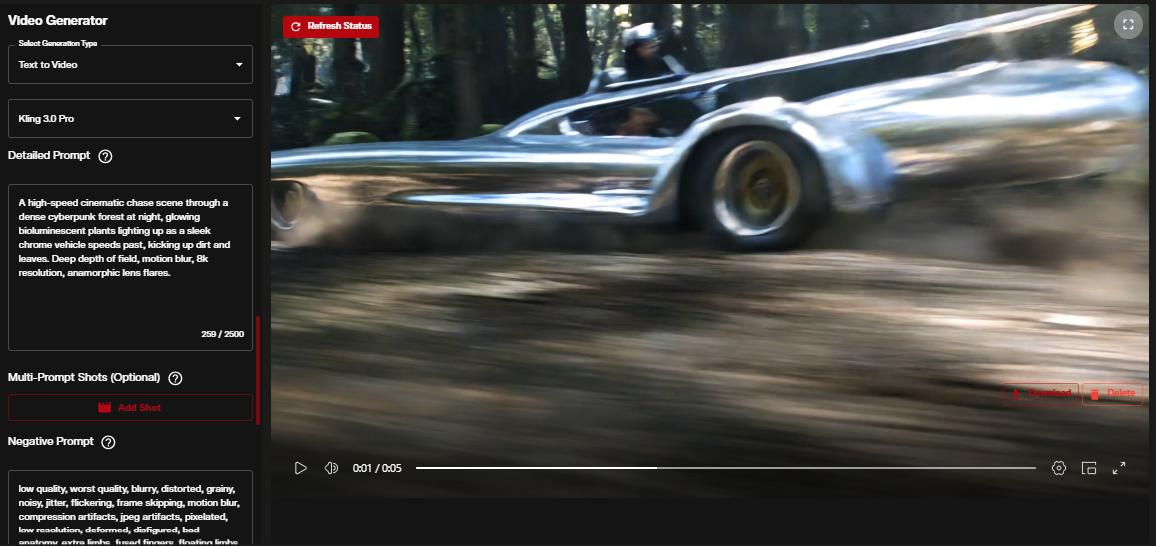
2. Crafting the Prompt
Kling 3.0 adheres tightly to complex narrative prompts. Instead of a basic description, provide the model with a "recipe" that includes subject, environment, lighting, and camera movement. By detailing the physical interactions, the model can leverage its advanced physics engine.
Example Prompt: Wide tracking shot, a vintage sports car speeds down a damp coastal highway at sunset. The camera smoothly follows alongside. Cinematic lighting, photorealistic, 4k.
Use the negative prompt field to eliminate unwanted artifacts by specifying terms like "blurry, morphed faces, low resolution, unnatural movement".
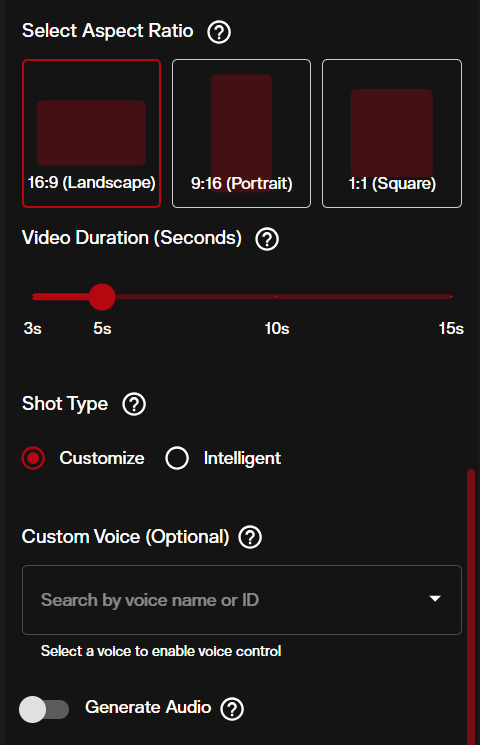
3. Configuring Settings
The right hand panel houses the crucial settings for your shot:
- Aspect Ratio: Choose 16:9 for traditional cinematic shots, 9:16 for social media, or 1:1 for versatile square formats.
- Duration: Select the desired clip length. Keep in mind that longer durations require more credits but provide expansive storytelling room.
- Audio Generation: Toggle this feature on to generate native ambient sound effects and audio synchronized with the visual output.
4. Generation and Review
Once your parameters are set, initiate the generation. The sophisticated physics calculations require a brief processing window. Upon completion, the result will be a cohesive, audio visual sequence ready for your timeline.
5. Image to Video Workflows
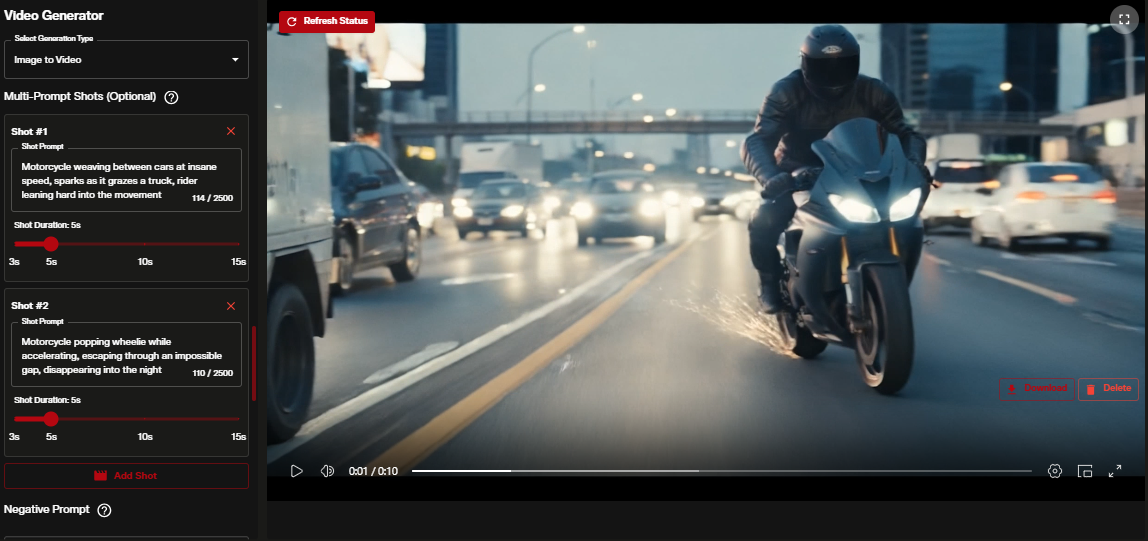
If you want to start with a visual reference, Kling 3.0 also supports Image to Video generation. Simply switch to the image upload interface and provide your starting frame.
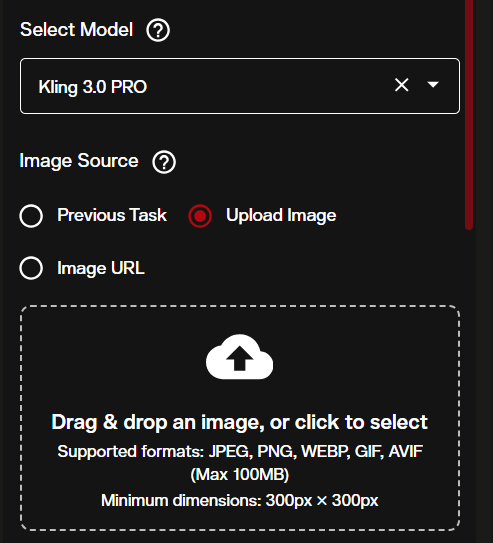
Once uploaded, you can add a text prompt to control the motion. Describe how the elements in the image should behave over time.
Advanced Control with Kling O1
For directors needing exact structural control, Kling O1 provides the ultimate tool: First and Last Frame video generation.
1. Preparing Your Frames
To execute a perfect transition or a seamless looping video, you need two distinct images. These can be generated using FLUX.1.1 PRO Ultra or uploaded from your own assets. The start frame defines the initial state, while the end frame defines the exact visual the clip must resolve to.
2. Setting Up the Transition
In the Video Generation workspace, select the Kling O1 model under the image to video tools. You will be presented with two specific upload zones. Upload your initial image into the Start Frame slot, and your target image into the End Frame slot.

3. Prompting for Motion
The text prompt for Kling O1 should describe how to get from the start frame to the end frame. Describe the camera movement, the action taking place, or the environmental shifts that occur during the transition. The model will calculate the necessary in between frames to bridge the two distinct visuals smoothly.
Automating with the Node Graph Editor
For creators building complex, multi stage pipelines, AI FILMS Studio provides a powerful visual workflow system. The Node Graph Editor allows you to chain Kling 3.0 models directly into automated generation pipelines.
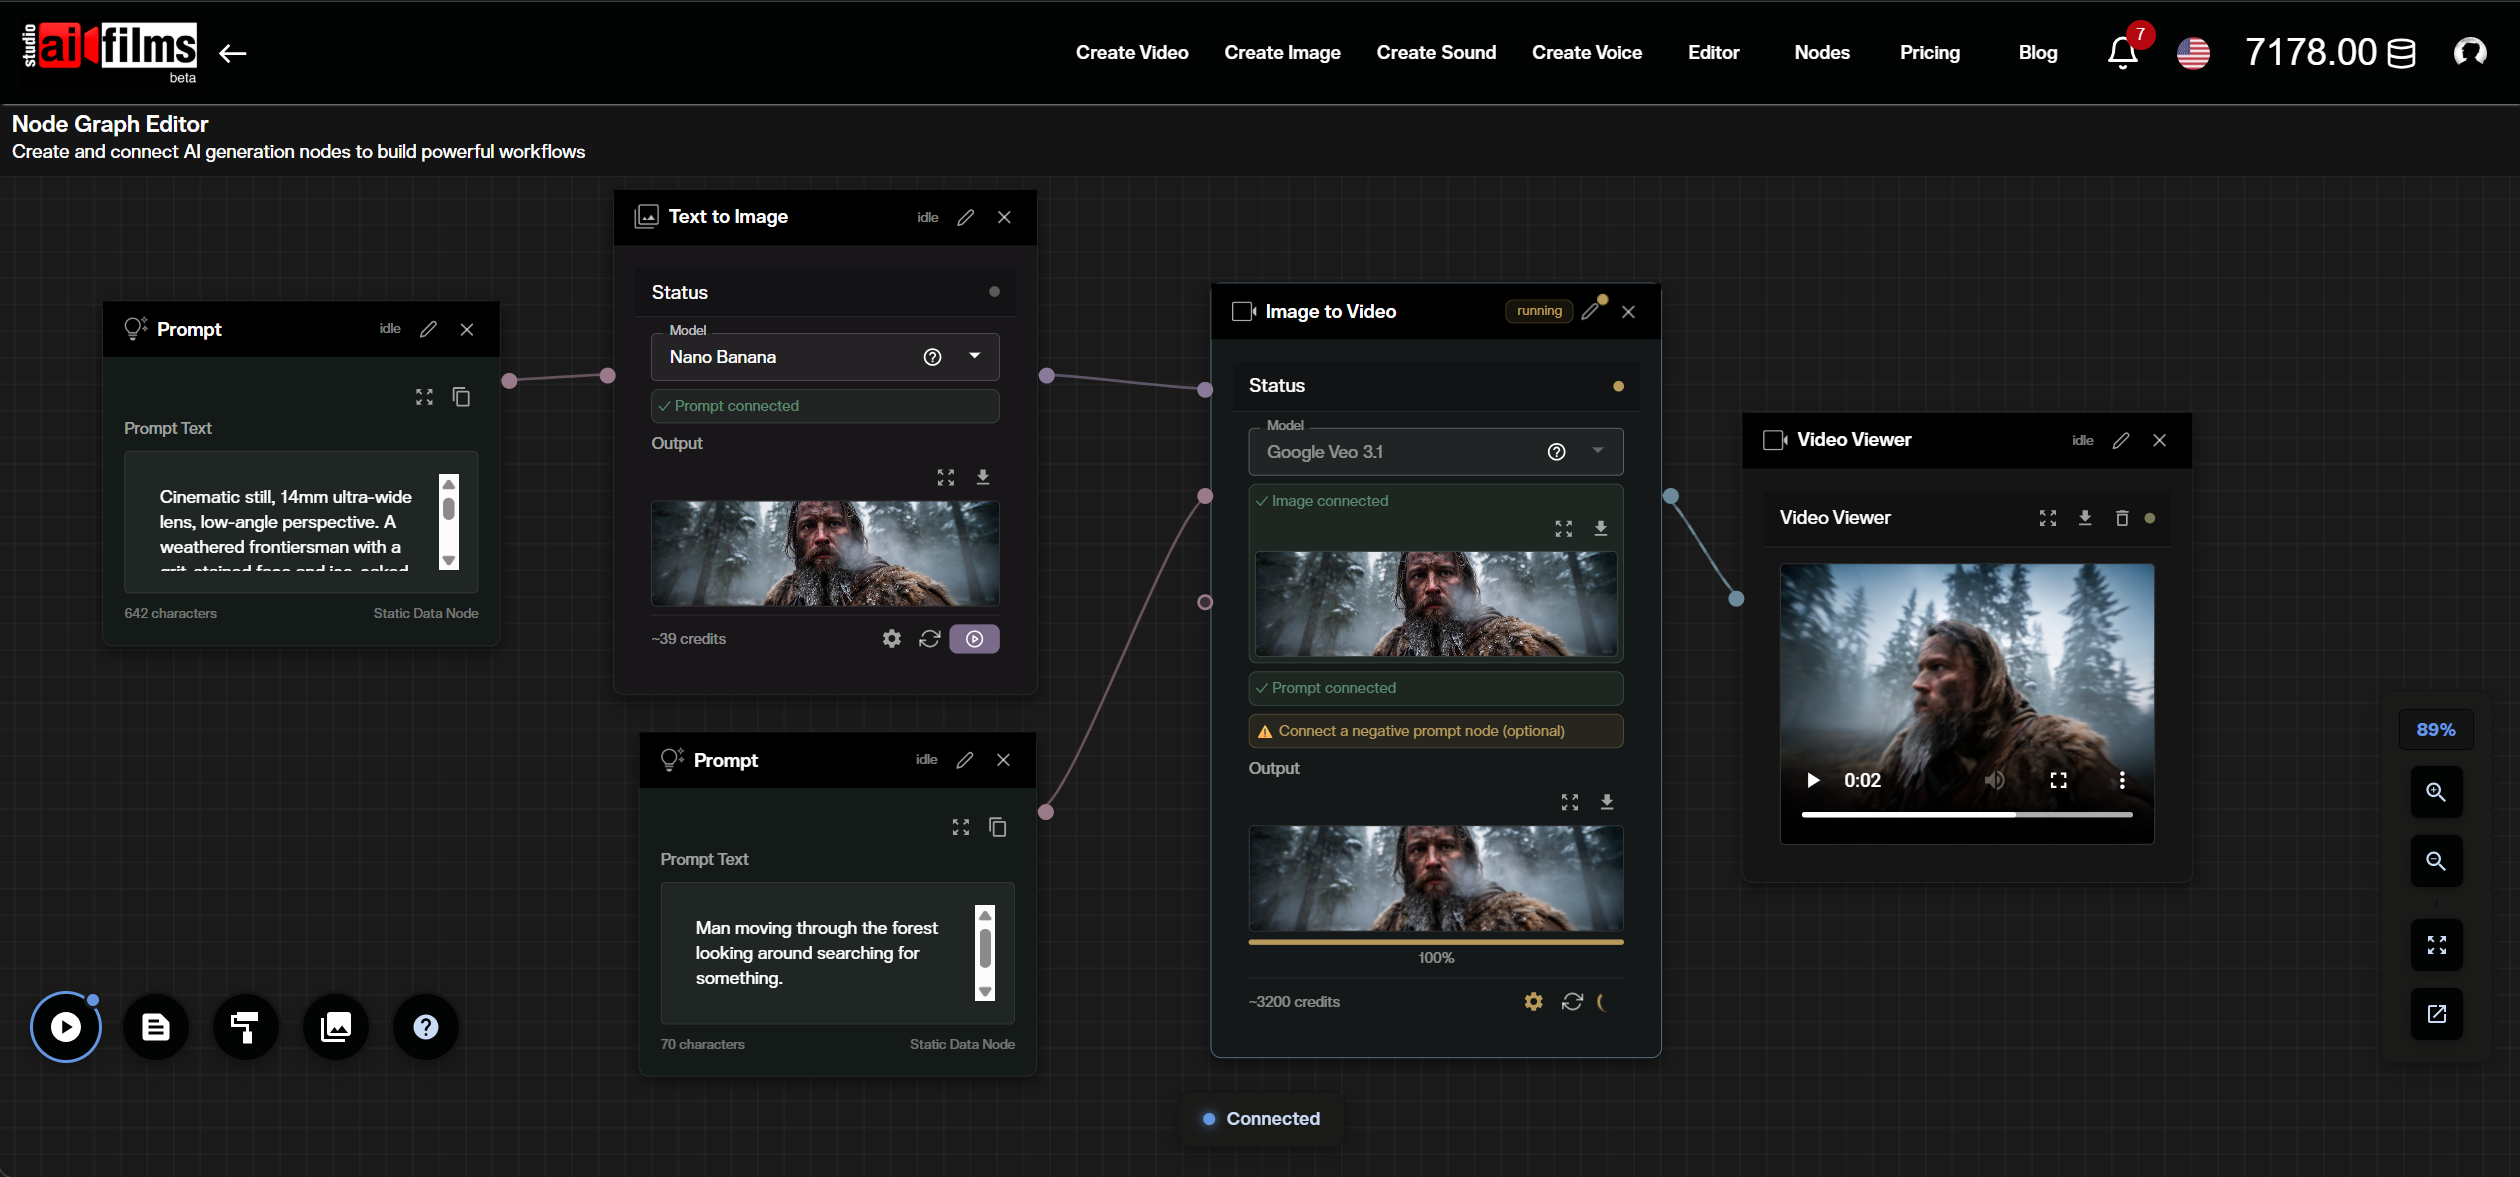
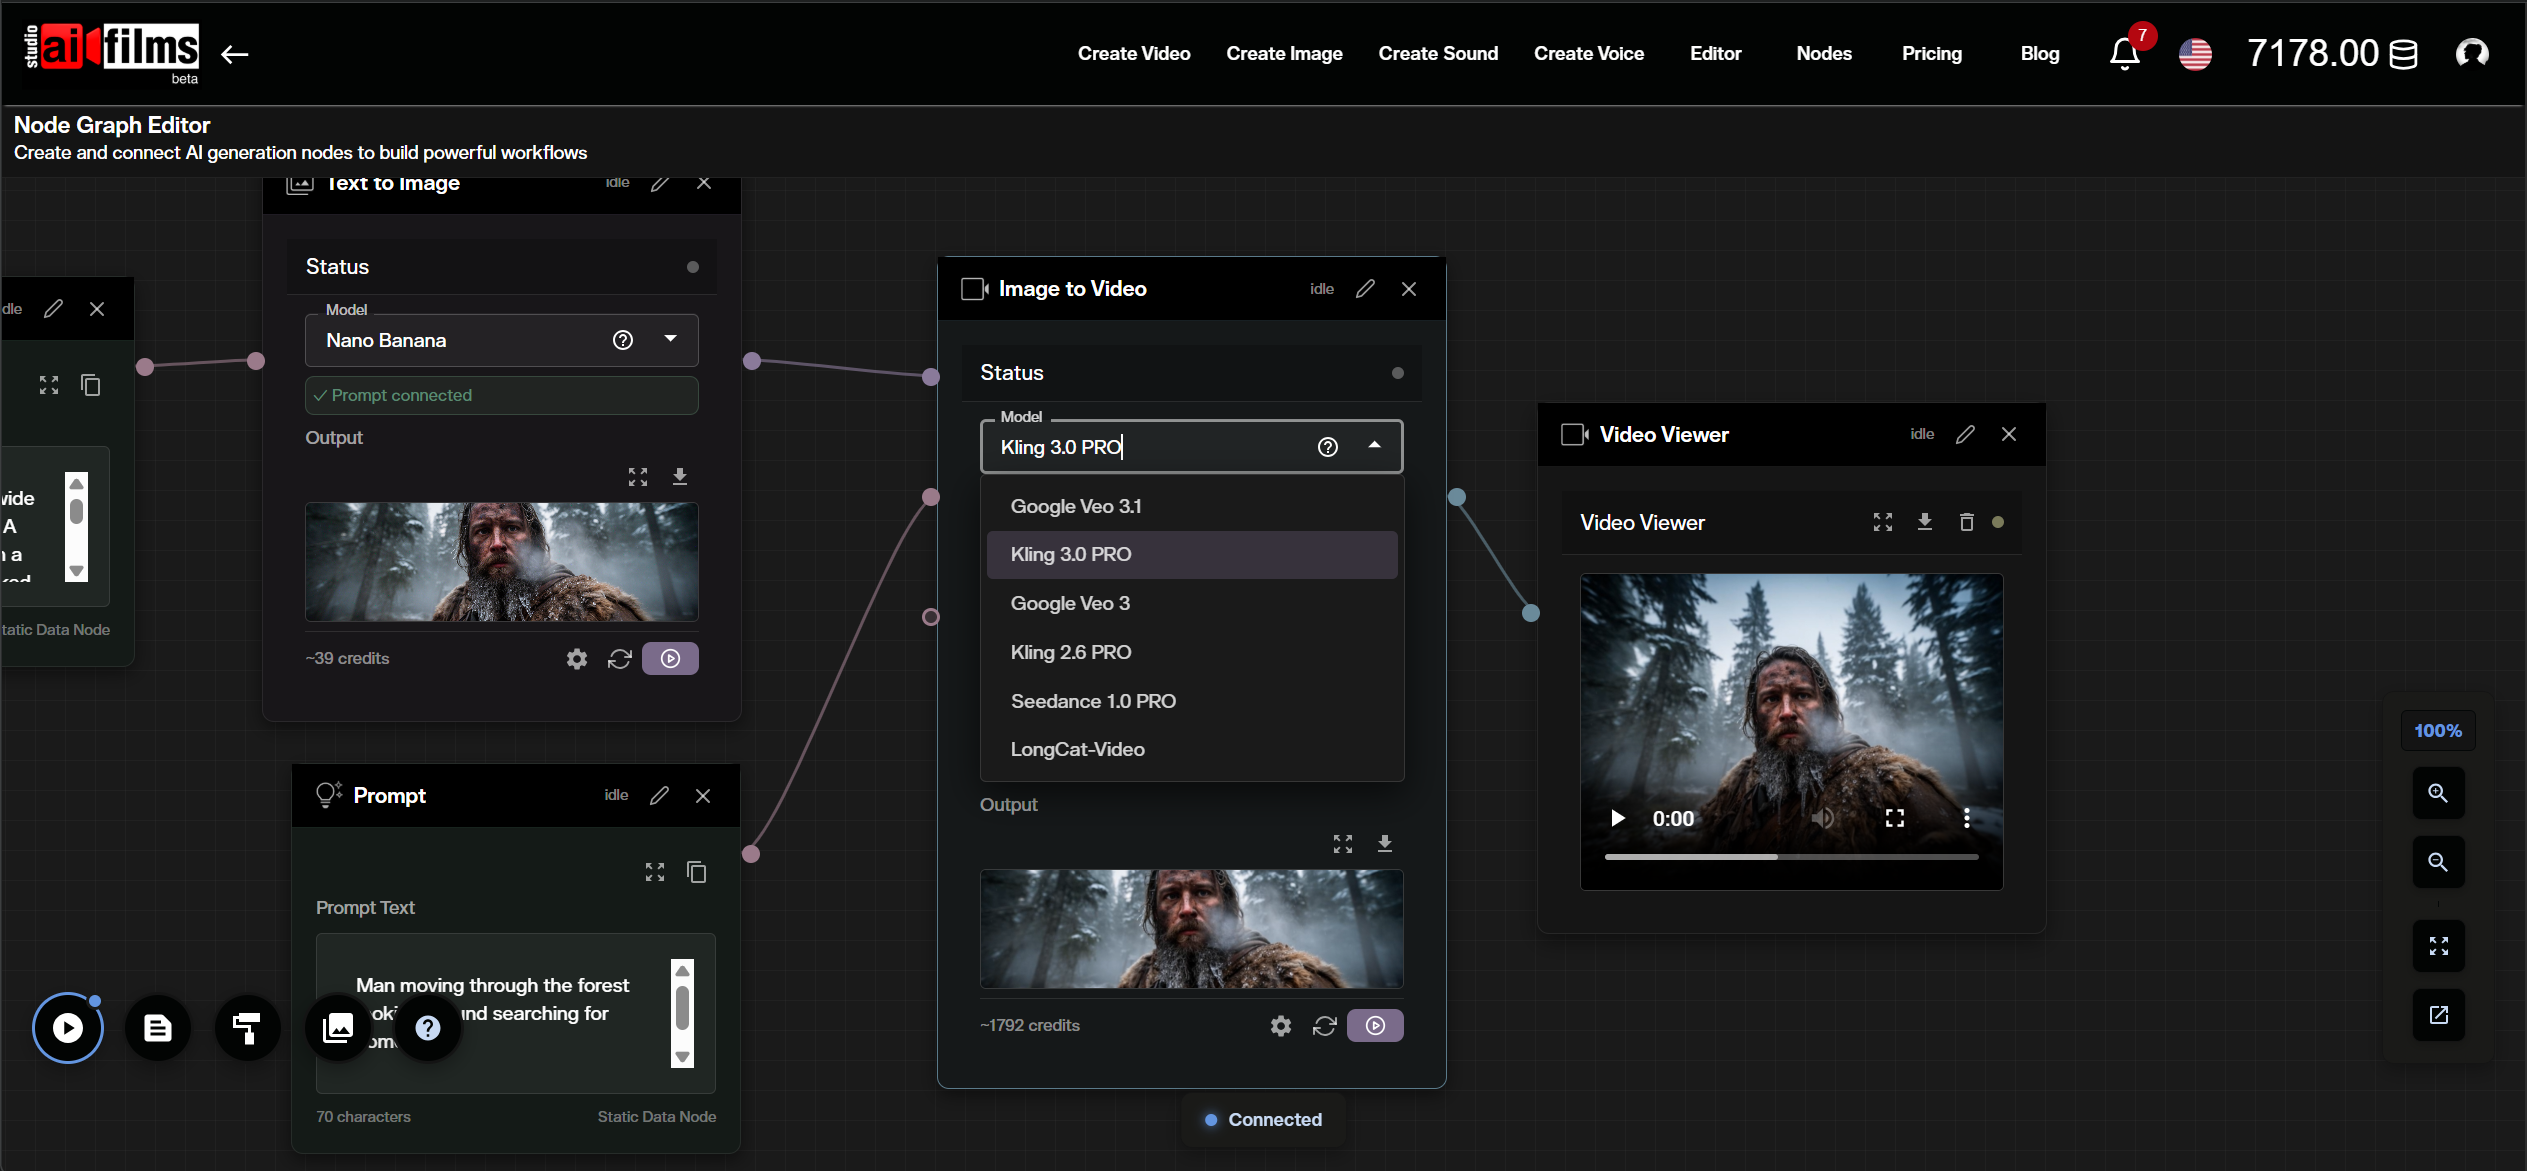
Setting Up a Kling Video Node
To use Kling within the editor, drag a "Text to Video" or "Image to Video" node onto the canvas. By default, these nodes might be set to other models. Click the model dropdown within the node's status panel to reveal the available generators and select Kling 3.0 PRO.
Connecting a "Prompt" node (Mauve port) to the Kling Video node (Sage input port) allows you to drive the generation. For Image to Video, connect an "Image Upload" node (Lavender port) or the output of a "Text to Image" node to provide the starting frame.
This visual approach is exceptionally powerful when combining models. For instance, you can automatically route a generated Kling video output (Steel port) directly into a "Video to Video Lipsync" node or a "Video Enhancer" node like Real-ESRGAN, creating a zero touch pipeline from prompt to final 4K spoken video.
Best Practices and Pro Tips
To maximize the potential of these models, consider integrating them into a broader workflow.
Combine your Kling O1 loops with Kling Lipsync to create interactive, speaking characters that move naturally within a scene. If a generation is structurally perfect but lacks the final polish, utilize the built in AI Video Enhancers like Real-ESRGAN or Topaz to upscale the output to pristine 4K resolution.
For precise control over body movement and facial identity transfer, explore our dedicated Kling 3.0 Motion Control tutorial. Motion Control lets you drive a new character with the exact motions from a reference video, opening up workflows like dance transfer, performance cloning, and controlled camera dynamics.
For multi shot sequences where the same character needs to appear consistently across several consecutive clips, the MultiShotMaster tutorial covers how to use MultiShotMaster's hierarchical prompt system to generate up to five shots in a single pass on AI FILMS Studio.
By mastering Kling 3.0 and O1, you bridge the gap between AI experimentation and professional AI filmmaking. Take these tools for a spin and see how they can transform your next project.
Kling's commercial momentum has grown quickly. Kuaishou is evaluating a $20 billion spinoff of the Kling unit ahead of a 2027 IPO, with the platform reaching 60 million creators and $500 million in annualized revenue.
Kling's real world production impact came into focus at Cannes 2026, where three international directors revealed how the 3.0 model enabled a team of seven to make a theatrical feature and cut one director's timeline from three years to five months.
For text-to-video and image-to-video generation at 720p and 1080p with five aspect ratios, Happy Horse 1.0 by Alibaba is also available on AI FILMS Studio.
For script driven narrative video where the same characters and environments must appear consistently across multiple beats, Vidu Q3 Drama brings a different approach to image-to-video. It accepts a full narrative script and up to 14 reference assets, generating cohesive sequences where visual identity stays locked from scene to scene.
Continue Reading


Video & LipSync
- Video Generator
- Text to Video
- Image to Video
- Start-End Frame to Video
- Draw to Video
- Motion Control
- Video Enhancer
- Video Upscaler
- Video to Video LipSync
- Audio to Video LipSync
- Image to Video LipSync
- Video FaceSwap
- Seedance 2
- Vidu Q3 Pro
- Gemini Omni
- Google Veo 3.1
- Kling 3.0 Pro
- LTX 2.3
- Happy Horse 1.1
- Kling 3.0 Motion
- ByteDance Upscaler
- InfiniteTalk
- InsightFace