
Share this post:
Kling 3.0 Motion Control Tutorial for AI FILMS Studio
Kling 3.0 Motion Control lets you transfer body movement, facial expressions, and camera dynamics from a reference video onto a new character. The result is a generated video where your subject performs the exact motions from your source clip, with consistent identity and high fidelity detail. This tutorial walks through every setting in AI FILMS Studio so you can start producing motion controlled video immediately.
If you are new to Kling on the platform, start with our Kling 3.0 and O1 video generation guide for foundational text to video and image to video workflows before diving into motion control.
What Is Motion Control?
Motion Control is a specialized Video Enhancer task type on AI FILMS Studio. Unlike standard text to video or image to video generation, Motion Control takes three inputs:
- A reference video containing the motion you want to replicate
- A character image showing the face or body you want to drive
- A text prompt describing additional context for the generation
The model analyzes the body movement, facial expressions, camera angles, and scene dynamics in your reference video, then reconstructs the sequence with your character image replacing the original subject. Kling 3.0 maintains facial identity from any angle, preserves complex emotions, and handles occlusions without losing clarity.
Accessing Motion Control
Motion Control lives under the Video Enhancer section of the Video Generation workspace.
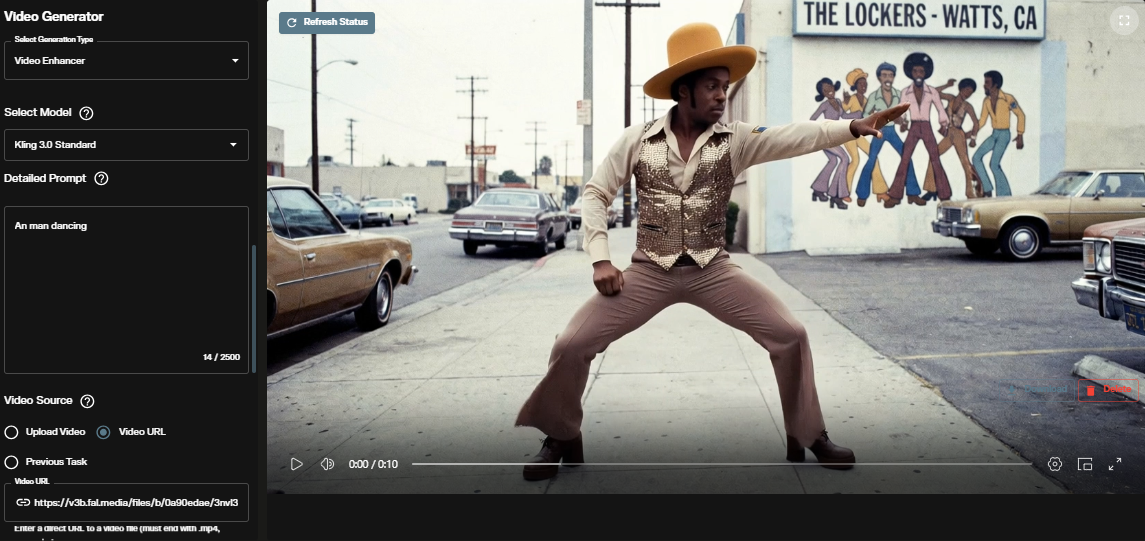
Step 1: Select Video Enhancer
Navigate to the Video Generation workspace and select Video Enhancer from the "Select Generation Type" dropdown at the top of the panel.
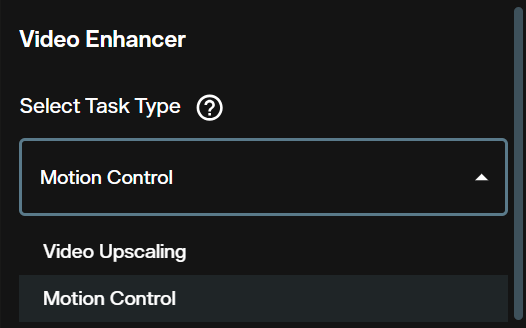
Step 2: Choose Motion Control Task Type
Under "Select Task Type," open the dropdown and choose Motion Control. The alternative option here is Video Upscaling, which serves a different purpose entirely.
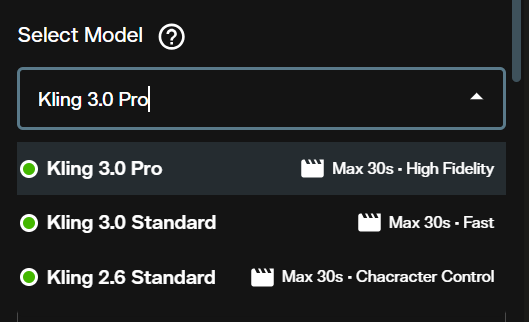
Step 3: Pick Your Model
The "Select Model" dropdown reveals three options:
| Model | Max Duration | Strength | Best For |
|---|---|---|---|
| Kling 3.0 Pro | 30s | High Fidelity | Final renders, close ups, commercial output |
| Kling 3.0 Standard | 30s | Fast | Quick iterations, draft previews, testing motion |
| Kling 2.6 Standard | 30s | Character Control | Legacy character consistency workflows |
Kling 3.0 Pro delivers the highest quality output with superior facial consistency across dynamic framing and complex body movements. Use it when the shot matters. Kling 3.0 Standard processes faster at a lower credit cost, making it ideal for testing different reference videos or prompt variations before committing to a final Pro render. Credit costs vary depending on the model selected, duration, and other settings you configure.
Configuring Your Inputs
With Motion Control selected, the interface presents four input sections that you need to configure.
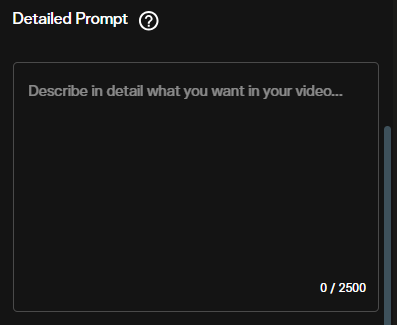
The Prompt
The Detailed Prompt field accepts up to 2,500 characters. Use it to describe the scene context, environment, lighting, and any specific details you want the model to consider beyond what the reference video provides.
Write your prompt in natural language. Describe what is happening in the scene, the mood, the environment, and any camera behavior. Kling 3.0 responds well to cinematic intent. For example:
Example Prompt: A man dances confidently on a sunlit urban street corner. Vintage storefronts in the background. The camera follows his movements with a slight handheld feel. Golden hour lighting, photorealistic, 4K.
Video Source
The Video Source section is where you upload or link the reference video containing the motion you want to transfer.
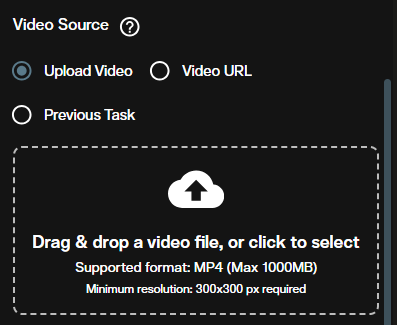
You have three input methods:
- Upload Video: Drag and drop or browse for an MP4 file (max 1000MB, minimum 300x300 px resolution)
- Video URL: Paste a direct link to an MP4 hosted online
- Previous Task: Select the output from a previously completed generation on the platform
The reference video defines all body movement, timing, and camera motion. Choose a clip with clear, unobstructed motion for best results.
Character Image
The Character Image section is where you provide the face or character that will be driven by the reference motion.
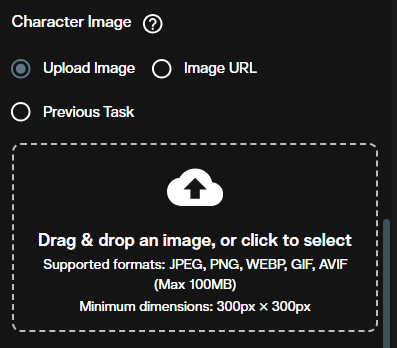
Supported formats include JPEG, PNG, WEBP, GIF, and AVIF (max 100MB, minimum 300x300 px). As with video, you can upload directly, provide a URL, or select from a previous task. For best results, use a clearly lit, front facing image where the subject's face is fully visible.
You can generate your character image directly on AI FILMS Studio using FLUX 2 image generation or any other image model on the Image Generation workspace, then feed the output into Motion Control via the "Previous Task" option.
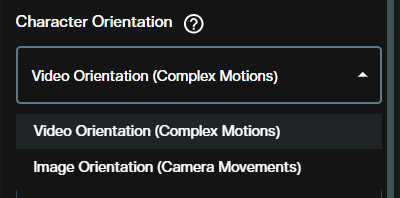
Character Orientation
The Character Orientation dropdown controls how the model interprets the relationship between your character image and the reference video.
| Option | Description | Use When |
|---|---|---|
| Video Orientation (Complex Motions) | Aligns the character to follow the video's full body motion and camera dynamics | Your reference video has dancing, walking, fighting, or other full body action |
| Image Orientation (Camera Movements) | Focuses on applying camera movements while keeping the character pose closer to the original image | You want subtle head turns, facial expressions, or camera driven movement only |
For most motion transfer workflows, Video Orientation (Complex Motions) is the right choice. Switch to Image Orientation (Camera Movements) when working with talking head shots or scenes where the body stays relatively static.
Elements (Optional)
The Elements section lets you add supplementary visual references to guide the generation. Click "Add Element" to include additional images that inform the scene composition, props, or environment beyond what the prompt describes.
Audio Options
The Audio Options toggle controls whether the original audio from your reference video is preserved in the output.
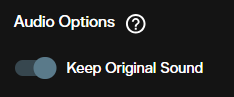
When Keep Original Sound is enabled, the audio track from your reference video carries over into the generated output. Turn this off if you plan to add your own soundtrack, voiceover, or sound design in post production. You can also generate speech separately using the Voice Generation workspace and sync it with Kling Lipsync.
Running the Generation
Once all inputs are configured, click Create at the bottom of the panel. The credit cost displayed reflects your current model selection and settings. Credit costs vary based on the model tier (Pro vs. Standard), the duration of the reference video, and resolution settings.
After processing completes, your generated video appears in the output viewer.
Review the output for facial consistency, motion accuracy, and overall quality. If adjustments are needed, try refining your prompt, swapping the character orientation mode, or switching between Standard and Pro models.
Using Motion Control in the Node Graph Editor
For automated, multi step workflows, Motion Control integrates with the AI FILMS Studio Node Graph Editor. This visual pipeline system lets you chain Motion Control with other AI models in a single execution.
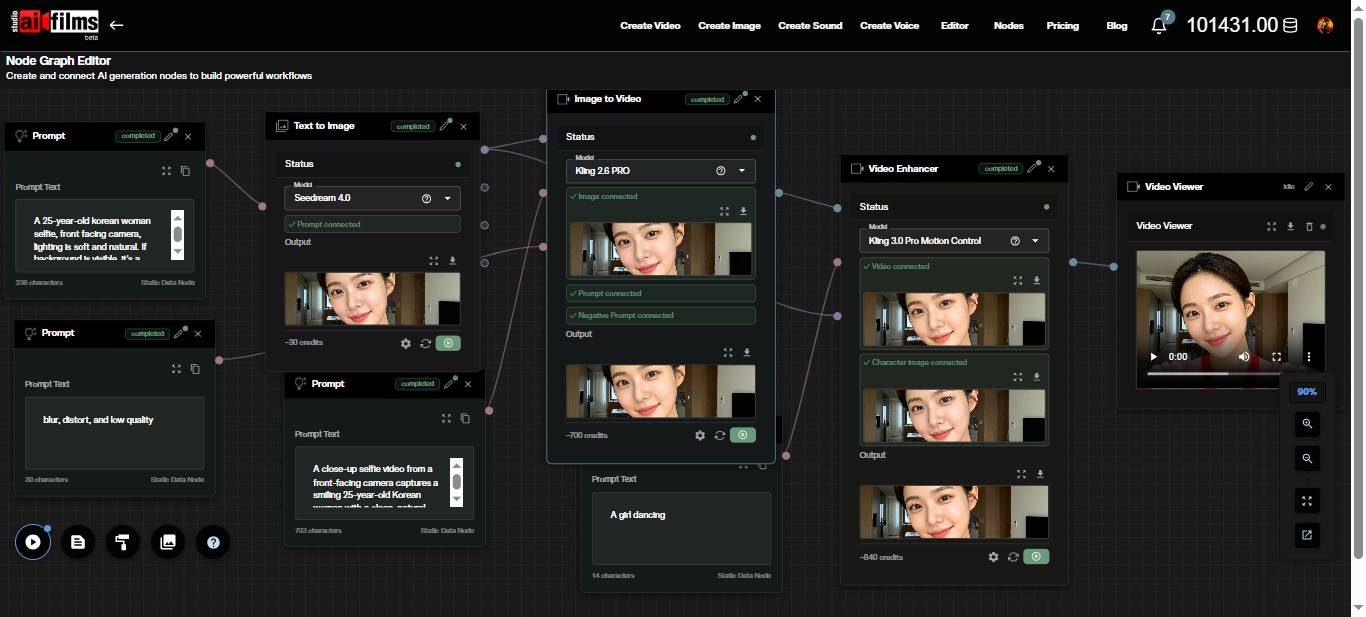
A typical motion control pipeline in the Node Graph might look like this:
- Image Upload node provides the character image
- Video Upload node provides the reference motion video
- Prompt node feeds the scene description
- Video Enhancer node (set to Motion Control with Kling 3.0 Pro or Standard) receives all three inputs
- Video Viewer or Result node displays the output
You can extend this pipeline further by routing the Motion Control output into a Video Enhancer node set to Video Upscaling (using Real-ESRGAN or Topaz) for resolution enhancement, or into a Text to Video Lipsync node for synchronized dialogue.
Pro vs. Standard: When to Use Each
Start with Standard, finish with Pro. Use Kling 3.0 Standard for rapid experimentation. Test different reference videos, character images, and prompt variations at a lower credit cost. Once you have the combination that works, switch to Kling 3.0 Pro for the final render.
Kling 3.0 Pro delivers noticeably sharper facial details, smoother motion transitions, and better handling of complex angles where the face is partially occluded. For commercial output, social media content, or anything that needs to look polished, Pro is the right choice.
Tips for Better Results
Reference video quality matters. Use well lit, high resolution source clips. Motion Control extracts movement data from the reference. Noisy, dark, or heavily compressed footage leads to less accurate motion transfer.
Keep the character image simple. A clean headshot or upper body portrait with neutral background gives the model the best data to maintain identity. Busy backgrounds in the character image can introduce artifacts.
Match aspect ratios. If your reference video is 16:9, your output will maintain that ratio. Plan accordingly when choosing source material.
Prompt specificity helps. Even though the reference video drives motion, the text prompt influences environment, lighting, and atmospheric details. Be specific about the visual context you want around your character.
Iterate before committing. Camera control research frameworks like Time to Move and practical tools like CamCloneMaster for cloning camera movements show that precise motion control is an evolving field. Experimentation is part of the process.
What Comes Next
Motion Control is one piece of a broader production pipeline. After generating your motion controlled clip, consider these next steps on AI FILMS Studio:
- Upscale to 4K using the Video Enhancer's Video Upscaling task type with Real-ESRGAN or Topaz
- Add dialogue with Kling Lipsync (text or audio driven) in the Video Generation workspace
- Generate a soundtrack in the Music Generation workspace using Lyria 2 or MiniMax Music
- Build multi shot narratives by combining multiple Motion Control outputs. Follow the MultiShotMaster tutorial to generate consistent multi shot sequences in a single pass, or read the MultiShotMaster research overview for the architectural details
- Create extended sequences with tools like LongCat Video Generator for clips beyond 30 seconds
All generated content on AI FILMS Studio is yours to use commercially with an active subscription. For full details on ownership and licensing, refer to the platform's Terms and Conditions.
Kling's enterprise client base now exceeds 30,000 companies. Kuaishou is evaluating a $20 billion spinoff of the Kling unit ahead of a planned 2027 IPO, a signal of how quickly the platform has moved from research into commercial production workflows.
Sources
Kling AI: Motion Control User Guide | Kling 3.0 Series API Reference
Continue Reading


Video & LipSync
- Video Generator
- Text to Video
- Image to Video
- Start-End Frame to Video
- Draw to Video
- Motion Control
- Video Enhancer
- Video Upscaler
- Video to Video LipSync
- Audio to Video LipSync
- Image to Video LipSync
- Video FaceSwap
- Seedance 2
- Vidu Q3 Pro
- Gemini Omni
- Google Veo 3.1
- Kling 3.0 Pro
- Luma Ray 3.2
- LTX 2.3
- Happy Horse 1.1
- Kling 3.0 Motion
- ByteDance Upscaler
- InfiniteTalk
- InsightFace