
FLUX 3 Video Tutorial: Text, Image and Start-End Frame to Video

Share this post:
FLUX 3 Video Tutorial: Text, Image and Start-End Frame to Video
FLUX 3 from Black Forest Labs is now available on AI FILMS Studio in three of the five video generation types. It builds video from a text prompt, from a single uploaded still, or from a pair of frames it animates between, at 720p or 1080p, at any whole second length from 5 to 20. All three modes offer seven aspect ratios, which is the widest choice in the entire video roster.
Seven is one more than any other model in any of those three forms reaches, and FLUX 3 is the only model in the workspace that offers 2:1. It is also the only model that carries a full ratio set into image-to-video. Most models drop that control and let the source image decide the shape.
This tutorial covers all three generation modes step by step, plus the node setup for each one in the Nodes Graph Editor. The model sits in the text to video generator, the image to video generator and the start and end frame generator, and it is the model all three dropdowns open on.
What Is FLUX 3
FLUX 3 is the Black Forest Labs video model. In text-to-video mode it builds a clip from a written description alone. In image-to-video mode it reads your uploaded frame as the opening shot and animates forward from it. In start and end frame mode it takes two frames and generates the shot that connects them.
The same name in all three dropdowns. Every list labels it FLUX 3. Several models in the workspace change their name between modes, so this one is easier to find than most. It is the first row in all three lists and the model each one opens on.
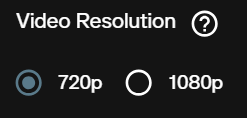
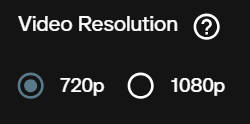
Video resolution. Two options, 720p and 1080p, identical in all three modes. 720p is selected by default. There is no lower draft tier, so 720p is the cheapest pass available.
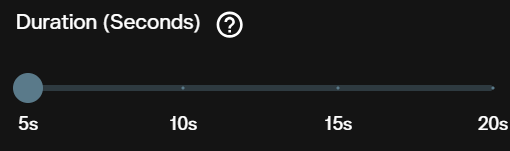
Duration. A slider from 5 to 20 seconds in whole seconds, identical in all three modes, opening at 5. That 20 second ceiling ties LTX 2.3 for the longest text-to-video clip in the workspace. In image-to-video, Vidu Q3 Drama runs longer at up to 30 seconds.
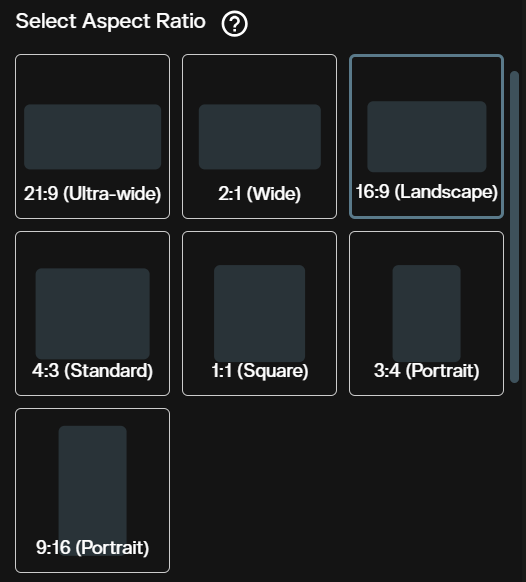
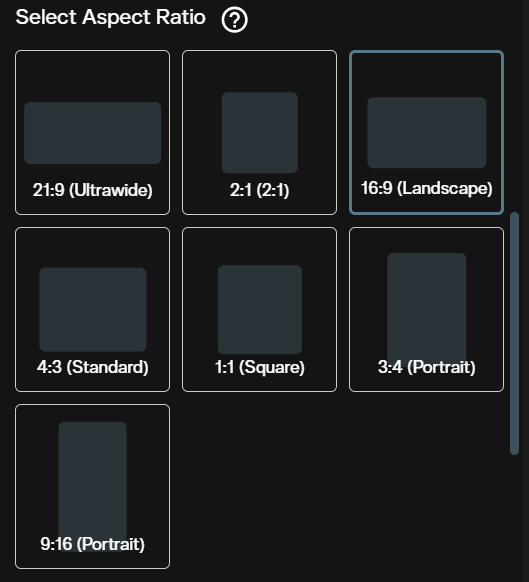
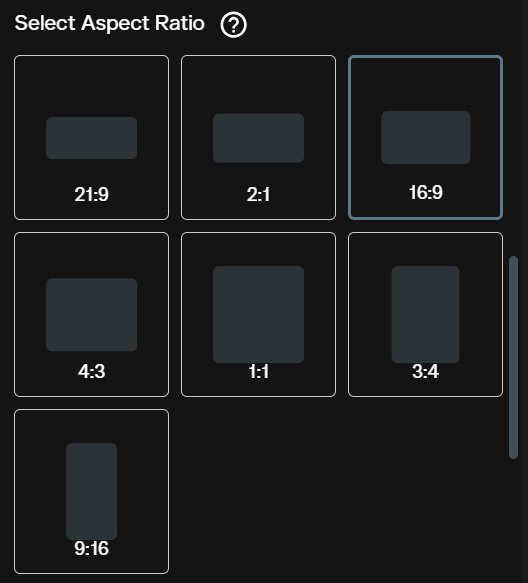
Seven aspect ratios, in all three modes. 21:9 ultrawide, 2:1, 16:9 landscape, 4:3 standard, 1:1 square, 3:4 portrait and 9:16 portrait. 16:9 is selected by default. No other model in any of the three forms offers more than six, and none of the others offers 2:1 at all.
Native audio. A Generate Audio switch appears in all three modes and is on by default. The model produces the soundtrack in the same pass as the picture, so ambience, effects and dialogue arrive timed to the footage rather than added afterwards.
Audio costs nothing extra. The credit rate is the same whether the switch is on or off. Turning it off saves you nothing, so there is no reason to disable it unless you plan to score the clip yourself.
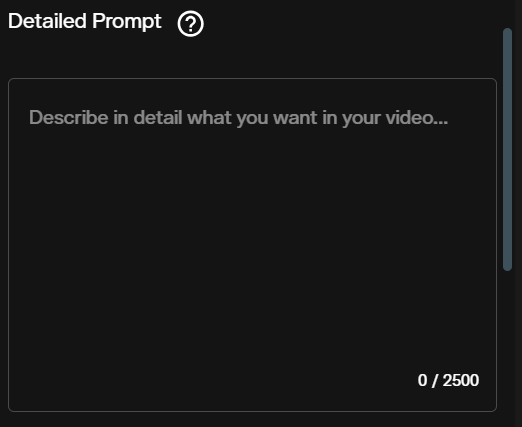
Prompt length. The Detailed Prompt field accepts up to 2,500 characters in all three modes. That covers camera behaviour, subject action, lighting, environment and the sound you want in one pass.
No negative prompt, no seed. Neither control appears in any of the three workspace forms for this model. Exclusions have to be written into the positive prompt. The Nodes Graph Editor does accept an optional negative prompt node, which is the only route to one.
Text to Video
Step 1: Open the video workspace
Go to AI FILMS Studio. The Video Generator panel loads on the left and generated clips appear on the right.
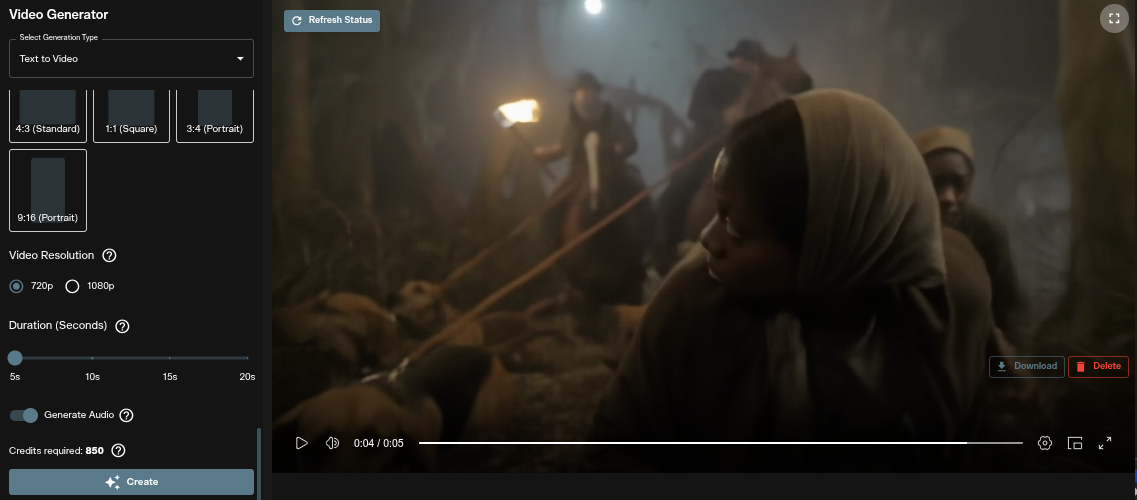
Step 2: Select Text to Video as the generation type
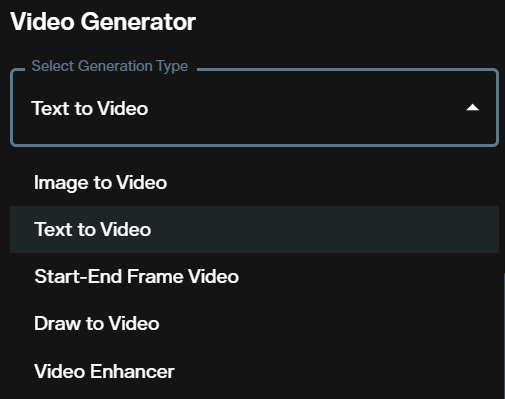
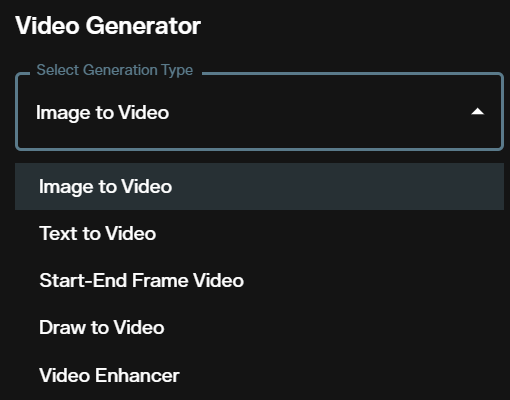
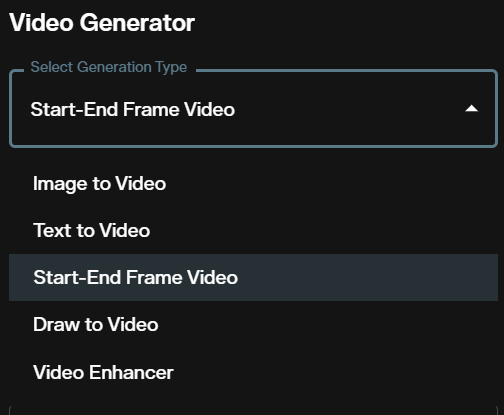
Open the Select Generation Type dropdown at the top of the panel and choose Text to Video. The same dropdown carries Image to Video, Start-End Frame Video, Draw to Video and Video Enhancer.
Step 3: Select FLUX 3
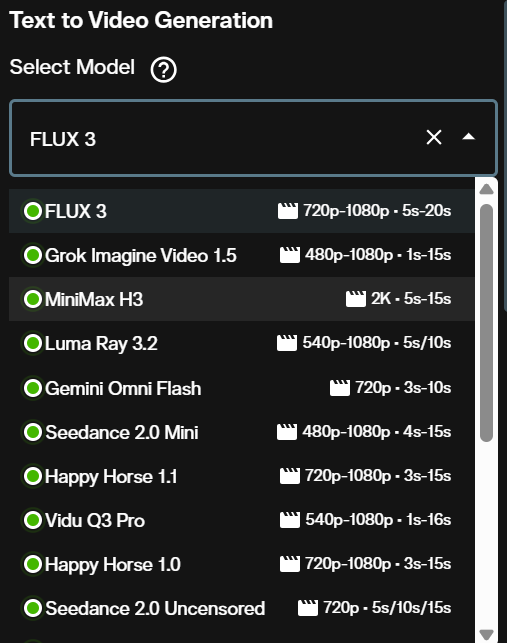
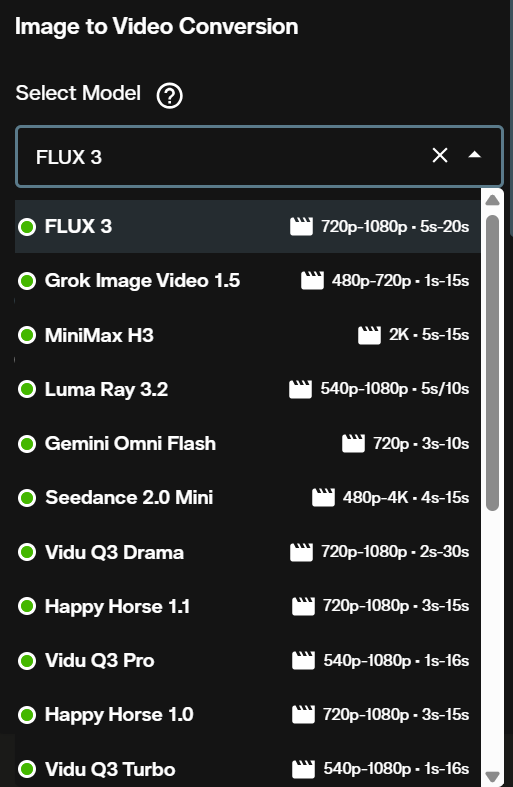
Open the Select Model dropdown and choose FLUX 3. It is the first row and the one already selected when the panel loads. Every row shows the resolution ceiling and the duration range, so the FLUX 3 row reads 720p to 1080p and 5s to 20s.
Comparing that row against the ones below it is the fastest way to rule a model in or out. Grok Imagine Video 1.5 sits directly underneath at 1s to 15s, which is the opposite trade.
Step 4: Write your prompt
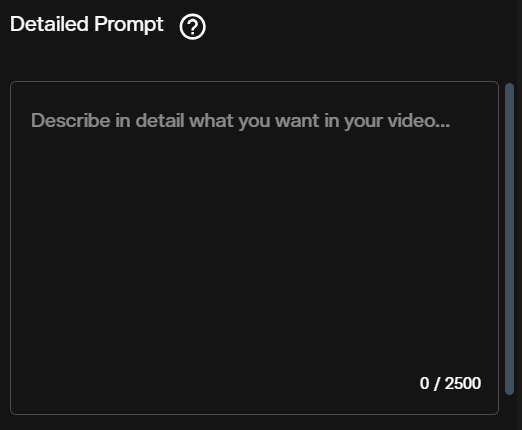
Enter your description in the Detailed Prompt field. Lead with the camera instruction, then the subject, then the environment and lighting, then the sound. The counter under the field tracks your usage against the 2,500 character limit.
Include the audio you want in the same prompt. "Rain on a tin roof and distant traffic" gives the model something to build a soundtrack from. Leaving sound unstated means the model chooses for you.
There is no negative prompt field here, so anything you want kept out of frame has to be phrased positively. Write "an empty road at dawn" rather than relying on a negative to remove traffic.
Step 5: Choose the aspect ratio
Pick one of the seven tiles. 21:9 Ultrawide and 2:1 suit cinema delivery and title sequences. 16:9 Landscape suits desktop and broadcast. 4:3 Standard suits archive and period looks. 1:1 Square covers social placements that crop badly at wider ratios. 3:4 and 9:16 Portrait suit vertical feeds.
2:1 is worth knowing about because no other model in the workspace has it. It sits between 21:9 and 16:9, which is the frame a lot of streaming drama is finished in.
Set this before generating. The ratio cannot be changed afterwards without a new generation.
Step 6: Choose the resolution
The Video Resolution control offers 720p and 1080p, with 720p selected by default. 1080p costs roughly 70 percent more per second.
Stay on 720p while you are still testing the prompt. Move to 1080p only for the take you intend to deliver. With no 480p tier below it, 720p is the draft tier for this model.
Step 7: Set the duration
Drag the Duration slider to any whole second between 5 and 20. The slider carries marks at 5s, 10s, 15s and 20s, and it opens at 5.
Leave it at 5 for the first pass on a new prompt. Five seconds is enough to see whether the model understood the subject, the framing and the direction of movement, and whether the audio it generated matches the scene.
Step 8: Check the audio switch and generate
The Generate Audio switch sits below the duration slider and is on by default. Leave it on. The rate is the same either way, so switching it off costs you the soundtrack for no saving.

Check the credit estimate above the button, then click Create. A 5 second clip at 720p reads 850 credits. The clip appears in the output panel on the right when processing finishes, with Download and Delete controls beneath it.
Text to Video in the Nodes Graph Editor
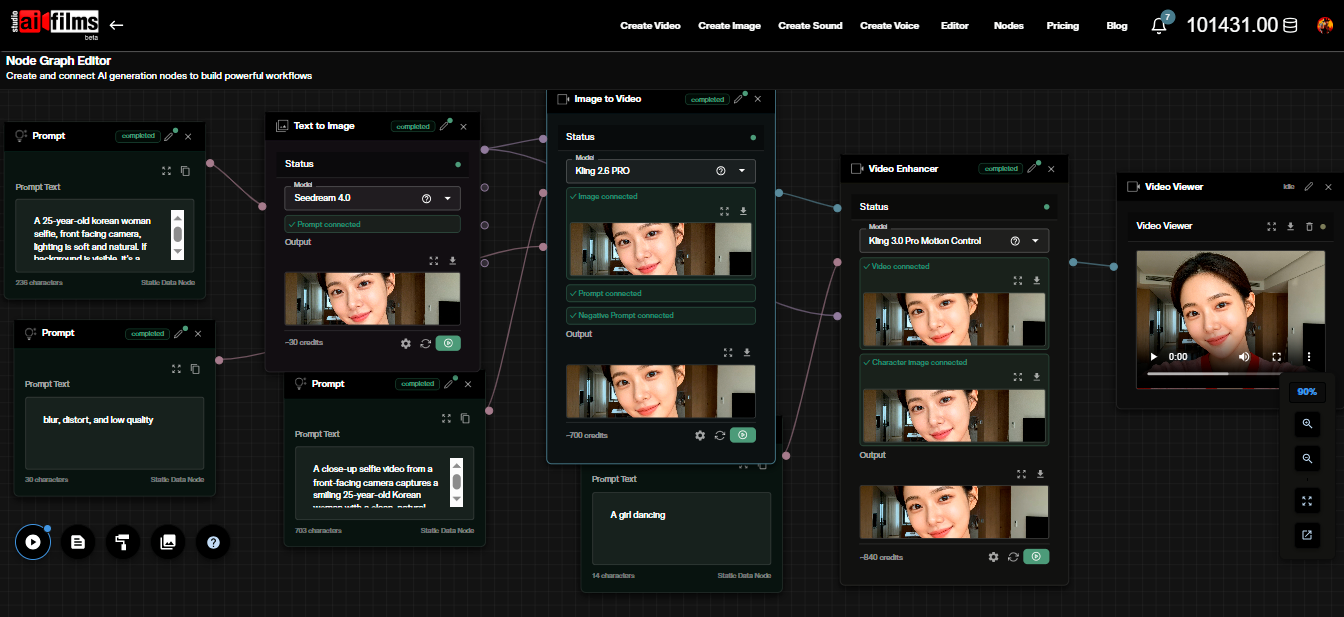
FLUX 3 text-to-video also runs as a node in the Nodes Graph Editor. Add a Prompt node and connect it to a Text to Video node. Open the model dropdown inside the node, choose FLUX 3, then set resolution, duration, aspect ratio and the audio switch in the node settings panel.
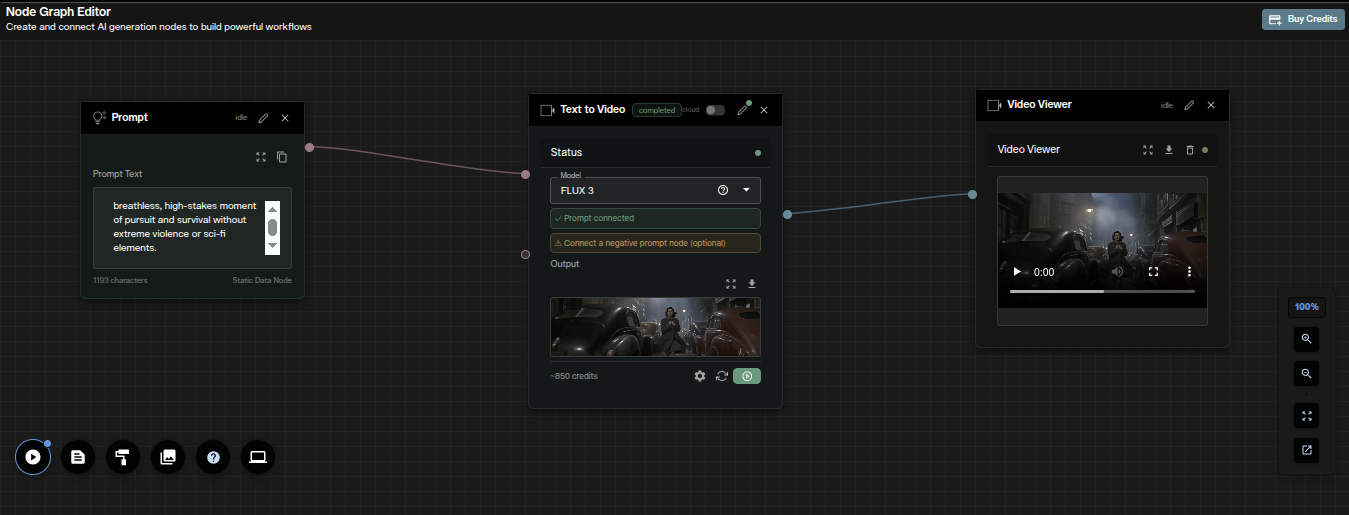
The node card shows its credit cost before you run it, so a 5 second generation at 720p reads roughly 850 credits. The card also confirms the prompt connection and offers an optional negative prompt node. That node is the only negative prompt this model has, and it is worth wiring when a specific element keeps appearing in output you did not ask for.
Connect the output to a Video Viewer node to play the result inside the graph. From there you can download the clip or pass it into another node, such as a video enhancer or a lipsync stage.
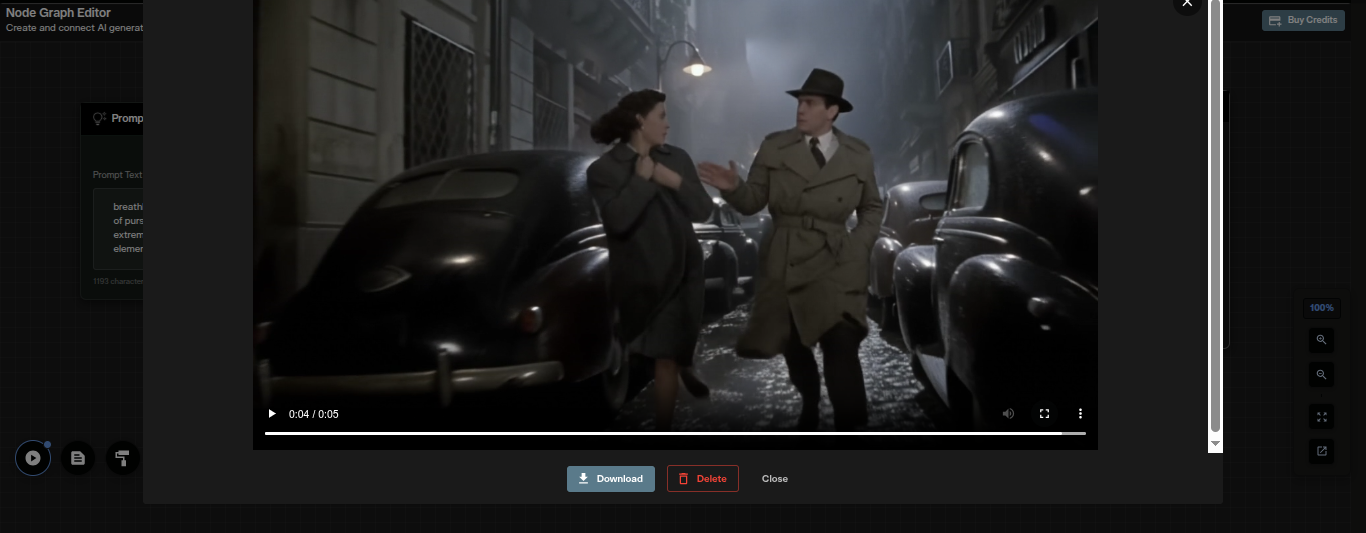
Image to Video
Image-to-video animates a still into a clip. The model reads your uploaded image as the first frame and carries its subject, lighting and composition forward through the generation.
Every control from text-to-video is present here, including all seven aspect ratios. That is unusual. Most image-to-video models in the workspace drop the ratio control and return whatever shape the source image had.
Step 1: Switch the generation type to Image to Video
Open the Select Generation Type dropdown and choose Image to Video. The panel reloads with an Image Source section above the prompt field.
Step 2: Select FLUX 3
Open the Select Model dropdown and choose FLUX 3. The row reads 720p to 1080p and 5s to 20s, the same figures as text-to-video. This is one of the few models in the workspace whose two modes carry identical specifications.
Step 3: Supply the source image
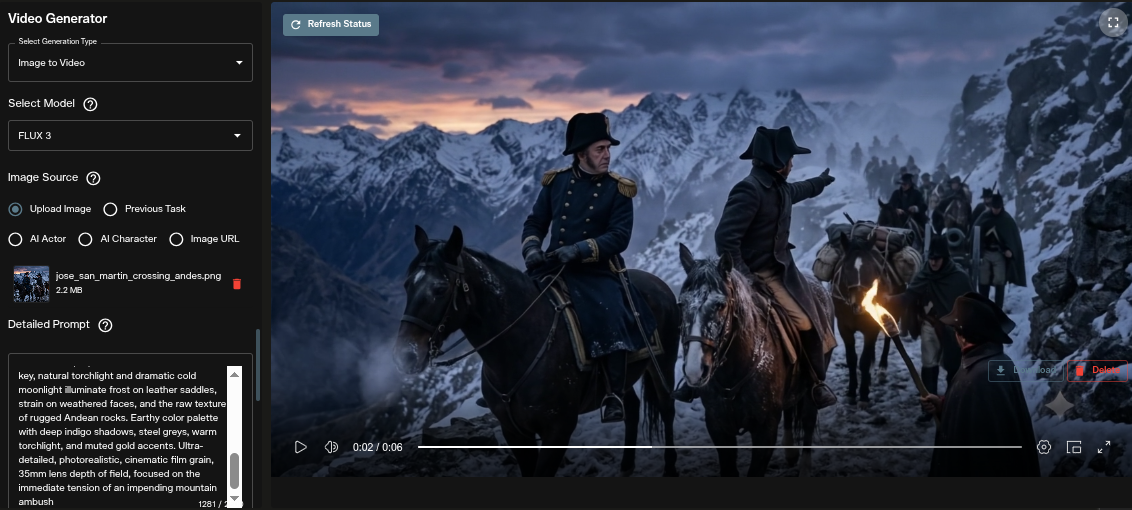
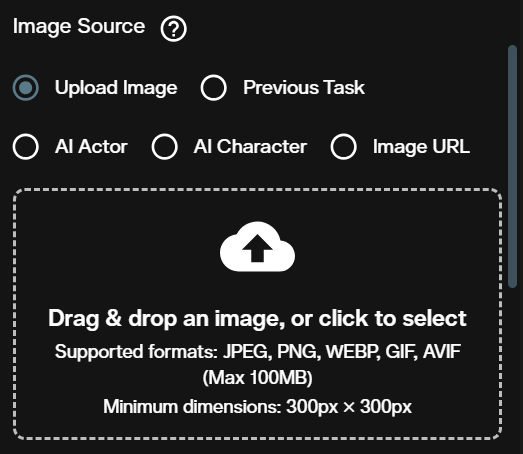
The Image Source section offers five inputs. Upload Image takes a file from your machine. Previous Task pulls a frame from something you already generated. AI Actor and AI Character pull from your saved characters. Image URL takes a link.
Uploads accept JPEG, PNG, WEBP, GIF and AVIF up to 100MB, at a minimum of 300px by 300px. The model takes one image. There is no last frame control and no multi frame input for FLUX 3.
Step 4: Write your motion prompt
Describe what moves and how the camera behaves. Skip the appearance of the subject, because the model already reads that from your uploaded frame. "The camera pushes in slowly as snow crosses the foreground" gives the model more to work with than a restatement of what is already in the picture.
Describe the sound as well. The audio switch is on here too, so a prompt that mentions wind, footsteps or a score gives the model direction instead of leaving it to guess.
The 2,500 character limit is the same as text-to-video, and there is still no negative prompt field.
Step 5: Choose the aspect ratio
All seven tiles appear here, exactly as in text-to-video. This is the control most image-to-video models do not give you.
It means you can reframe while you animate. A 16:9 photograph can come back as a 9:16 clip for a vertical feed without recropping the source first. Match the ratio to where the clip is going rather than to the shape of the still you started with.
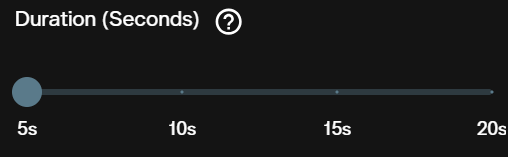
Step 6: Choose the resolution and duration
The Video Resolution control offers 720p and 1080p with 720p selected, and the Duration slider runs 5 to 20 seconds with marks at 5s, 10s, 15s and 20s. Both match text-to-video exactly, and so do the rates.
A 5 second pass at 720p is the cheapest way to check whether the model respects your source frame. Identity drift and warping on the subject show up in the first seconds when they are going to show up at all.
Step 7: Check the audio switch and generate
The Generate Audio switch is on by default in this mode too, and it carries no surcharge.

Review the credit estimate and click Create. The animated clip appears in the output panel and can be downloaded from there.
Image to Video in the Nodes Graph Editor
The image-to-video mode runs as a node too. Add a Prompt node and an Image Upload node, and connect both into an Image to Video node. Select FLUX 3 in the node model dropdown, then set aspect ratio, resolution, duration and audio in the node settings panel.
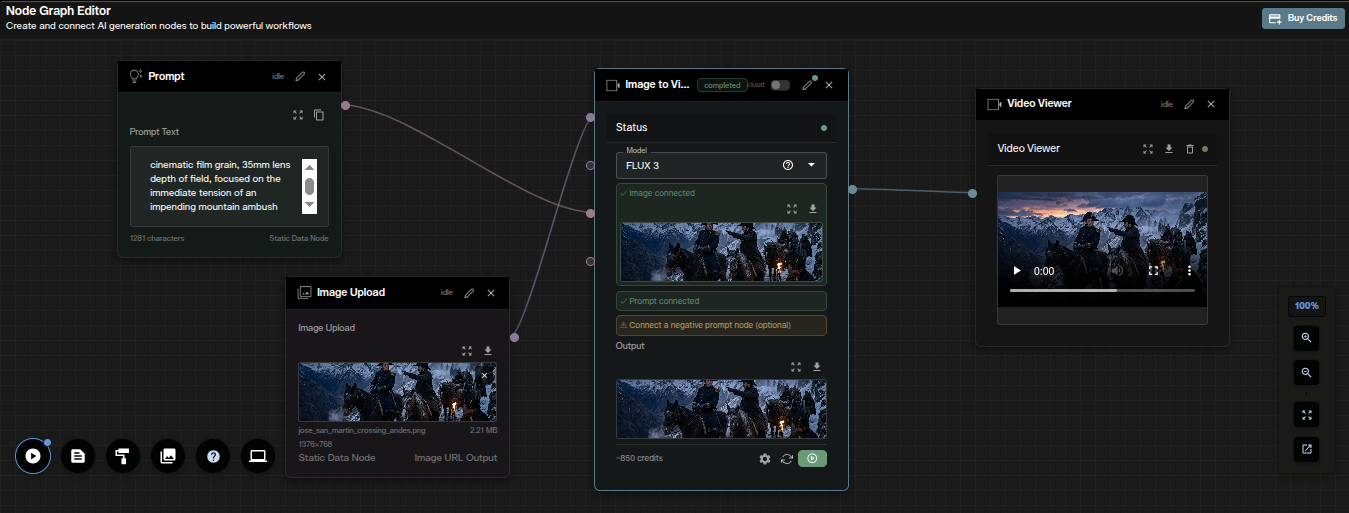
The node confirms both connections before it will run, showing Image connected and Prompt connected on the card. A 5 second generation at 720p reads roughly 850 credits, the same as text-to-video. As with text-to-video, a negative prompt node is optional.
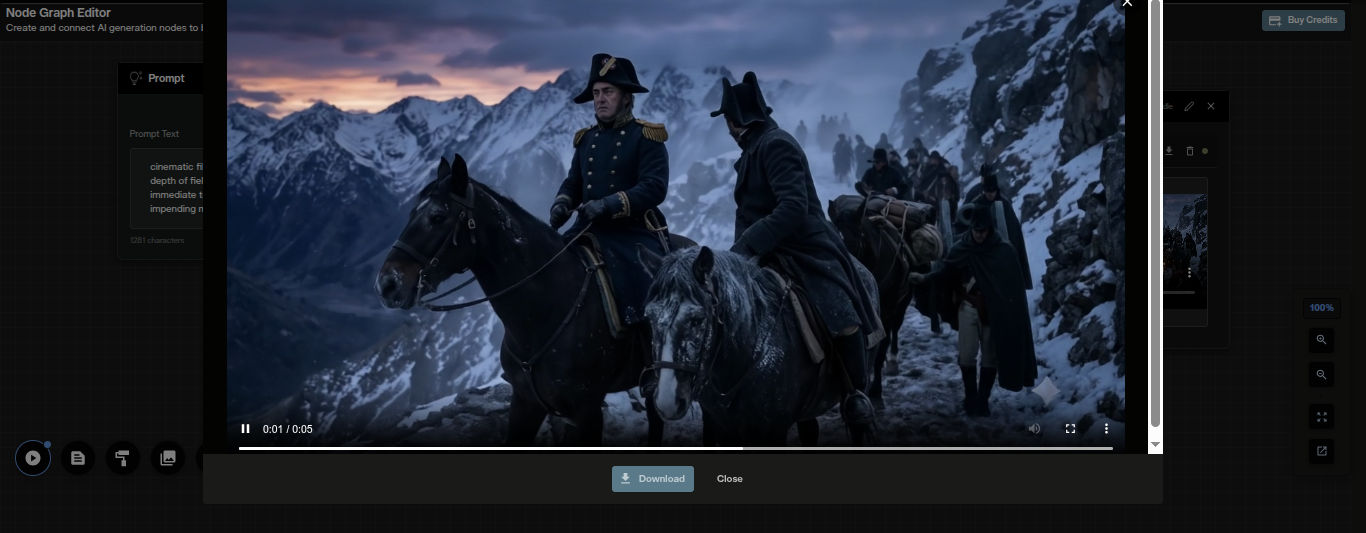
Connect the output to a Video Viewer node to review the clip inside the graph. This layout is worth saving when you animate a batch of stills, because only the Image Upload node changes between runs.
Start-End Frame Video
Start and end frame video takes two images and generates the shot between them. You supply the first frame and the last frame, and the model works out the movement that connects the two. It is the mode for a reveal, a morph, a before and after comparison, or a transition that has to hand off cleanly to the next clip in an edit.
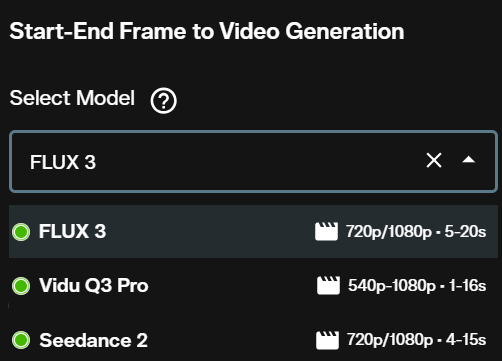
FLUX 3 is the default model in this form and the first of only three options. The other two are Vidu Q3 Pro and Seedance 2.
Step 1: Switch the generation type to Start-End Frame Video
Open the Select Generation Type dropdown and choose Start-End Frame Video. The panel reloads with two image input sections instead of one.
Step 2: Select FLUX 3
Open the Select Model dropdown and choose FLUX 3. The row reads 720p/1080p and 5-20s, matching the other two modes exactly.
This list is short. Vidu Q3 Pro spans 540p to 1080p at 1 to 16 seconds, and Seedance 2 runs 720p to 1080p at 4 to 15 seconds. FLUX 3 is the only one of the three that reaches 20 seconds, and the only one with seven aspect ratios.
Step 3: Supply the start frame
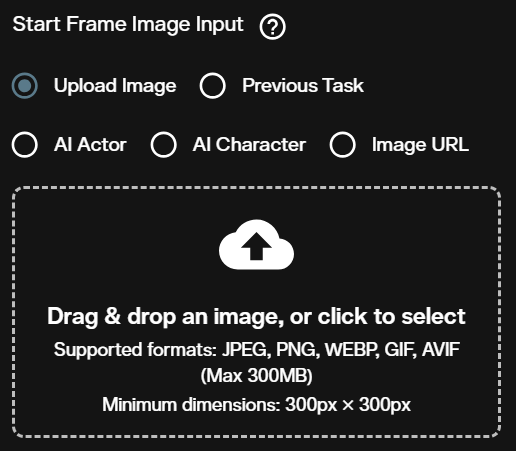
The Start Frame Image Input section offers the same five sources as image-to-video. Upload Image, Previous Task, AI Actor, AI Character and Image URL.
This frame is required. Uploads accept JPEG, PNG, WEBP, GIF and AVIF at a minimum of 300px by 300px, up to 300MB.
Step 4: Supply the end frame
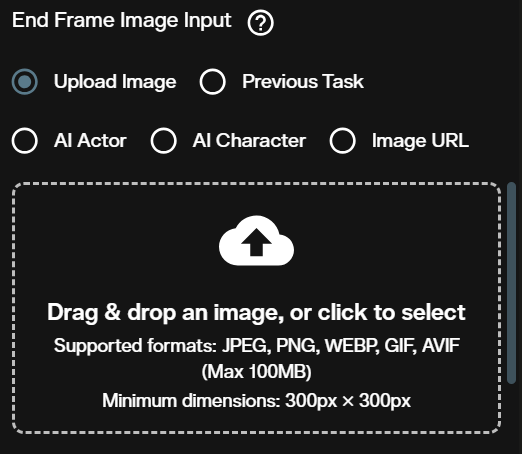
The End Frame Image Input section works the same way and is also required. Neither frame is optional in this mode.
The upload ceiling here is lower. The end frame block accepts up to 100MB where the start frame block accepts 300MB. If a large file is rejected on the second block after the first one went through, that difference is why.
Choose two frames a single continuous shot could plausibly connect. Sharing a subject, a lighting setup and an approximate camera position gives the model a path to follow. Two unrelated images still produce a clip, but it reads as a dissolve rather than as a shot.
Step 5: Describe the route between the frames
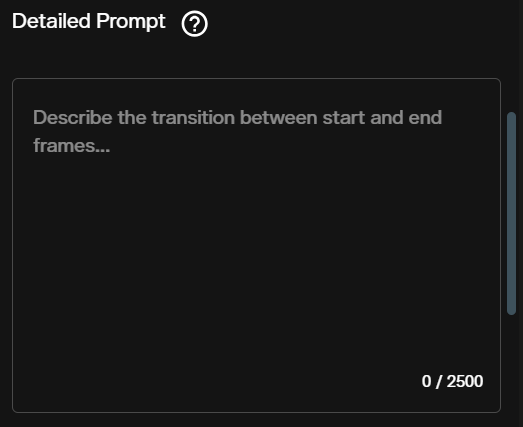
The Detailed Prompt field is required in this mode, and the placeholder tells you what it wants. "Describe the transition between start and end frames."
Describing the contents of either image is wasted effort, because the model already holds both. Spend the 2,500 characters on the route instead. Name what moves, what stays fixed, how the camera travels, and how fast the change happens. "The camera cranes down as the fog clears and the figure steps into the light" gives the model a path. "A man in a coat on a hillside" gives it nothing it cannot already see.
Step 6: Choose the aspect ratio
All seven tiles appear here as well, labelled by ratio alone rather than with the orientation names used in the other two forms. 16:9 is selected by default.
The other two models in this form get six ratios and a different set, so switching models after you pick a ratio can move your selection.
Step 7: Set resolution and duration, then generate
Resolution offers 720p and 1080p with 720p selected. The Video Duration slider runs 5 to 20 seconds with marks at 5s, 10s, 15s and 20s.
Duration does more work in this mode than in the other two. It sets the speed of the transition rather than only its length, because the two endpoints are fixed. The same pair of frames reads as a slow drift at 20 seconds and as a snap at 5.
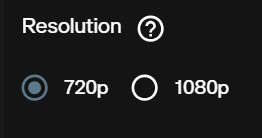
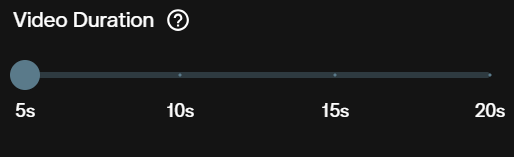
Two controls disappear when you select FLUX 3 here. Movement Amplitude and Background Music belong to Vidu Q3 Pro and do not apply to this model. FLUX 3 has a single Generate Audio switch, on by default, and takes its motion direction from the prompt rather than from an amplitude setting.

Check the credit estimate and click Create. The rate is the same as the other two modes, so a 5 second transition at 720p costs 850 credits.
Start-End Frame in the Nodes Graph Editor
This mode runs as a node too. Add a Prompt node and two Image Upload nodes, one for each frame, and connect all three into a First-Last Frame node. Wire the output to a Video Viewer node.
FLUX 3 is the default model on that node, so the settings panel opens on it. The panel carries the same four controls as the workspace form. All seven aspect ratios, 720p and 1080p, the 5 to 20 second slider, and the Generate Audio toggle.
Keep the two Image Upload nodes clearly labelled. The node takes a start frame and an end frame in a fixed order, and swapping them runs the transition backwards.
Credit Costs
All three modes bill the same way. Cost is the duration multiplied by a rate that depends only on the resolution. Image-to-video adds no surcharge for the source image, the two frame mode adds none for its frames, and audio adds nothing at either resolution.
| Duration | 720p | 1080p |
|---|---|---|
| 5s | 850 | 1,450 |
| 10s | 1,700 | 2,900 |
| 15s | 2,550 | 4,350 |
| 20s | 3,400 | 5,800 |
One table covers all three generation modes, which is rare in this roster. The Grok Imagine Video 1.5 tutorial covers a model that needs two tables for two modes, because its image-to-video mode drops a resolution tier and adds a flat charge for the source image.
Duration is the only variable worth managing at 720p. A 20 second clip costs four times a 5 second clip, and moving that same 20 seconds to 1080p adds another 2,400 credits. The MiniMax H3 tutorial covers the opposite arrangement, a model fixed at 2K where resolution is not a choice at all.
Credits for failed generations are refunded automatically. For subscription details, see AI FILMS Studio pricing.
Prompt Tips for FLUX 3
Write the sound into the prompt. Audio is generated in the same pass, so the prompt is the only place to direct it. Name the ambience, the effects and any dialogue. "Boots on wet gravel, wind through pine, no music" gives the model three decisions it would otherwise make on its own.
Pick the ratio before anything else. Seven options is more freedom than any other model in the workspace gives you, and it is also more chances to pick the wrong one. Decide where the clip is going first, then choose the tile. Nothing about the frame can be changed after generation.
Use 2:1 for drama. No other model in the workspace offers it. It reads wider than 16:9 without the letterboxing of 21:9, which is why so much streaming drama is finished there.
Test at 5 seconds and 720p. An 850 credit pass is the cheapest look this model allows. Run two or three of them on a new prompt before you touch the resolution control. Going straight to 20 seconds at 1080p costs 5,800 credits and tells you nothing extra about composition.
Reframe while you animate. In image-to-video the aspect ratio control is live, so a landscape still can become a vertical clip in one step. Feed the model the highest resolution source you have and let it handle the reframe rather than cropping first and losing detail.
In start and end frame mode, describe the route and nothing else. The model already holds both images, so every word spent on what is in them is wasted. Write what moves, what holds still, how the camera travels and how fast the change lands. Duration is the second half of that instruction, because it sets the speed of the transition rather than only its length.
Write exclusions as inclusions. With no negative prompt field, the only way to keep something out of frame is to fill that space with something else. "A bare concrete wall behind the subject" works. Wishing for no text on the wall does not.
Use the graph for negative prompts. When a specific artefact keeps appearing, rebuild the shot in the Nodes Graph Editor and attach a negative prompt node. The workspace form cannot do this, and it is the one capability the graph adds for this model.
Several models in the video roster generate their soundtrack in the same pass. The WAN 3.0 tutorial covers the one that runs to 30 seconds and exposes a seed field, at a 1080p ceiling and five aspect ratios rather than seven.
For the direct opposite trade, the Grok Imagine Video 1.5 tutorial covers a model that drops to a single second and has no audio at all. The LTX 2.3 tutorial covers the other model that reaches 20 seconds, in four fixed steps rather than a free slider. The Vidu Q3 Drama and Turbo tutorial covers the Q3 family, whose Pro variant is the second option in the start and end frame form, and the Seedance 2.0 tutorial covers the third. The MiniMax H3 tutorial covers a fixed 2K model with no draft tier.
Sources
Black Forest Labs: Black Forest Labs
Continue Reading
.jpg?w=3840)


Video & LipSync
- Video Generator
- Text to Video
- Image to Video
- Start-End Frame to Video
- Draw to Video
- Motion Control
- Video Enhancer
- Video Upscaler
- Video Extend
- Video to Video LipSync
- Audio to Video LipSync
- Image to Video LipSync
- Video FaceSwap
- Seedance 2.5
- WAN 3.0
- Seedance 2
- FLUX 3
- Minimax H3
- Vidu Q3 Pro
- Grok Imagine Video 1.5
- Gemini Omni
- Google Veo 3.1
- Kling 3.0 Pro
- Luma Ray 3.2
- LTX 2.3
- Happy Horse 1.1
- Kling 3.0 Motion
- ByteDance Upscaler
- InfiniteTalk
- InsightFace
Image & Edit
- AI Character
- AI Actor
- Art Generator
- Text to Image
- Image to Image
- LoRA Image to Image
- Draw to Edit
- Image LoRA Training
- Remove Background
- Image Enhancer
- MidJourney 8.0
- Krea 2
- OpenAI GPT Image 2.0
- Nano Banana Pro Ultra
- Nano Banana 2 Lite
- Nano Banana Pro
- Minimax Image
- Clarity Pro
- Z-Image Turbo LoRA
- Krea 2 Turbo LoRA
- Z-Image LoRA Trainer
- Qwen Image LoRA Trainer
- Background Erase Network 2 (BEN2)